18 April 2016

Top 10 Factors to Consider Before Renovating Your Kitchen


Decide what you want to achieve

Before you get out the sledgehammer, it’s important to know exactly what you want to achieve from your renovation. Are you looking to add a purely aesthetic change to your space. Perhaps you want to add functionality? Or maybe you want the space you’re in to better reflect your lifestyle. Whatever your purpose, there are many options for kitchen renovation in Melbourne that will be able to suit your needs, so do your research.

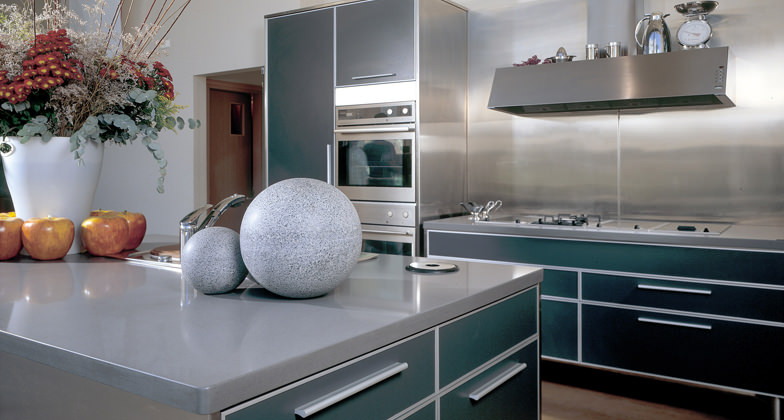
Visualise your decor 

Collect samples of colours, textures and furniture that you want to exhibit in your new and improved space. Keep this mood board handy, so you can stick to a central theme when making every decision about your kitchen. This will ensure you don’t have any colliding aspects, and your kitchen will be both practically and aesthetically coherent.

Choose timeless trends

Another thing to be wary of is choosing timeless trends that won’t age or date. The last thing you want is to spend time and effort on a renovation that is going to be out of date in a few years’ time.

Don’t forget about the details

When renovating your dream kitchen, it can be easy to overlook the fine details, as the tradesmen and contractors you hire won’t pay any attention to these. The true beauty of designing a new space is in the exquisite details, so make sure you consider those smaller styling elements as well.

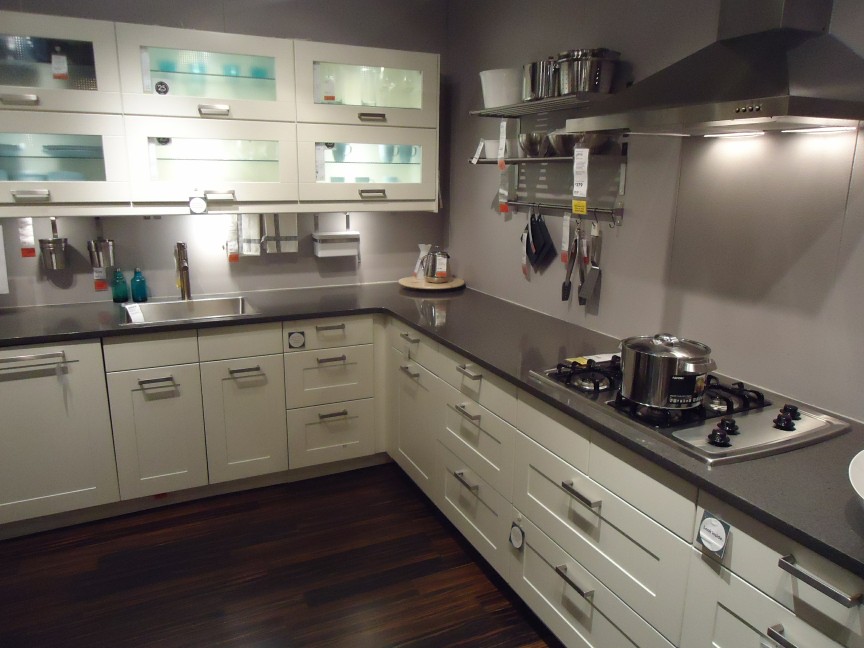
Choose fitting appliances

A kitchen is usually the room in the house with the most whitegoods and appliances visible. Therefore, it is vital that you choose appliances that go with the rest of your decor and your overall theme. These days, there are a wide range of colours and styles of appliances you can choose from, and more often than not you can choose appliance sets, so they will all be matching.

Timing is key

It’s important to be mindful of the order in which each step of the renovation process is carried out. Of course, sticking to a strict schedule usually doesn’t go specifically to plan. However, it’s a good idea to have a process of when and how you want things to be done.

Be prepared for the long haul

A kitchen renovation can be quite a big job. Don’t be put off by this, but do keep in mind that it’s going to take a quite a considerable amount of work and time to achieve your dream kitchen. You only get out what you put in!

Don’t demolish

Before you hold your own demolition party, bear in mind that many elements of your old kitchen may be able to be reused or recycled. Take care in dismantling your existing kitchen, as it could save you a small fortune.

Small touches are vital

Does your kitchen really need a whole renovation? If not, there are several simple and affordable touches that can add up to create an entirely new look without hurting your wallet. Concentrate on updating just the focal points of your kitchen such as new bench tops and a splashback which could make a huge difference.

Remember, a renovation should be an investment

It might seem enticing to keep costs down by skimping on certain elements of your renovation. However, it is important to remember that a renovation is an investment which adds value to your home and cutting corners could end up costing you more in the long run.

Take heed of these 10 helpful tips when you’re renovating your kitchen, in order to get the most out of your space as possible. Happy renovating!

11 April 2016

The Warning Signs of a Potential Plumbing Disaster


Blocked drains are a common problem for homeowners, but it doesn’t mean that they’re not still pretty stressful. Taking the plug out of the sink and having the water go nowhere is clearly worrying. So too is flushing the toilet and having it come close to overflowing. These problems trigger alarm bells, because they are an unmistakable sign that something is wrong.

Fortunately, there are plenty of reliable plumbing companies that are used to dealing with blocked drains in Melbourne. If you fear that you might have a problem, you need to get in touch with these experts right away. They will come round to your home, diagnose the issue, and get to work on solving it. You’ll have your drains back to normal in no time.

This guide to some of the most common warning signs of a potential plumbing disaster will help you identify the problem quickly.

Sluggish Draining

You probably have a blockage somewhere if you take the plug out of the sink and the water empties very slowly or not at all. This type of damage can also occur in the shower. If left untreated, it will get worse. There is a risk of whatever is blocking the pipe (usually food waste) from rotting and flooding back out of the sink.

Nasty Smells

If a clog is preventing dirt and debris from moving down the pipe, as it usually would, you could start to smell a bit of a nasty whiff coming from the drain. This happens because hair, dirt, and food waste is building up behind the blockage and slowly decomposing. It is a really unpleasant symptom and most homeowners can’t go longer than a week without calling in professional help.

Gurgling Noises

Sometimes, blocked drains can cause fixtures to make a bubbling, gurgling sound. This might be an indication that you have a main sewer drain clog, particularly if you hear it while you shower as well. On the other hand, all drains are different. If you do hear strange noises, watch to see if the water leaves the drain reasonably quickly.

If it does, you should be fine. If it doesn’t, you may need to call in a plumber to fix what could be a blocked drain. Make sure that you give a plumber all of the details about the problem that you can, when you first speak to them on the phone. It will help them identify the issue faster.

Unusual Flushing

A blocked drain or pipe can sometimes manifest itself in the form of abnormal flushing responses. So, when you flush the toilet, the water either rises much higher than normal or there is a lot less water than usual in the bowl.

If you experience either of these things, deal with the problem quickly, because it can lead to toilet water rising up through sinks and shower drains. Once again, get on the phone to the professionals. They will be able to find a solution in no time, so that you can get on with life and keep your home functioning smoothly.

Washing Machine Back Ups

If your washing machine causes the sink in your bathroom to start gurgling and spewing water, you definitely have a clog or blockage somewhere. As the water in the appliance drains, there should be no obvious activity in the bathroom pipes.

It can be difficult to trace the source of blockages without expert help, so don’t delay. The faster that you address the issue, the less risk there is of it turning into a flood hazard. Though rare, this can happen. Address potential blockages quickly and efficiently.


29 March 2016

What is the best coffee machine you can get for under $300?


If your day is only complete when you have had a great espresso, then you need an impressive espresso machine to produce it. There are many espresso machines on the market but not all of them produce the high quality results that you need. The ideal product that you are looking for is one which comes at an affordable cost while producing the delicious espresso that you crave.

We know that choosing an espresso machine can be a difficult task which is why we have taken a look at some of the advice available to help you decide. You can take a look at some of the details of the machines you can purchase for $300 or less. Here is an overview of the information we have found.

What to look for in an espresso machine

If you are looking for a reliable espresso machine for less than $300 then there are a few points you may want to consider when making your decision. We had Amanda from Coffee-Channel.com help us come up this list thorough list:

The speed with which you can get an espresso

If you love an espresso then you are probably not going to want to spend ages waiting to produce one. You should think about buying a machine with a large water tank as a well as a dual boiler; opt for a machine that can brew and steam milk at the same time. All of this things mean that you will have a machine that is quicker to produce that espresso you want and quicker to recover afterwards.

Ease of use

How important this is really depends on how often you are going to use your espresso machine. If you are intending to use it regularly then you do not want to have to spend ages setting it up every time. You may want to choose an automatic espresso machine which is probably the best match to your needs.

How easy is the machine to use?

If you do not want to have to spend time learning how to use an espresso machine you should choose one that really just involves using a few buttons. If you do not do this then you are probably going to stop using it pretty quickly which is a complete waste of money.

How good is the espresso?

Of course, one of the most important things about an espresso machine is the quality of the espresso it produces. Getting a great espresso does not have to involve spending a lot of money; many more reasonably priced machines produce excellent results.

Which machines represent great value?

Given the points you should be considering, here are a few espresso machines costing under $300 that you may want to consider.

Breville ESP8XL Café Roma
Type of machine: semi-automatic
Dimensions: 9 x 9 x 12"
Warranty: one year
This espresso machine comes with a warming tray for your mugs. It is easy to clean due to the slide out drip tray and is really simple to use. You can check out the current available deals for this machine.

Capresso EC PRO
Type of machine: semi-automatic
Dimensions: 8 x 11 x 12"
Warranty: one year
This machine can brew at different temperatures. It has a built in cup warmer and excellent frothing ability. If you want to check the latest prices for this machine click here.

DeLonghi EC330-s
Type of machine: Semi-automatic
Dimensions: 11 x 8 x 12"
Warranty: one year
Once this machine is warm it is self-priming. It is also extremely durable and has a deep and easy to clean drip tray. Check out the latest price information for this machine.

DeLonghi EC680 Dedica
Type of machine: automatic
Dimensions: 13 x 6 x 13"
Warranty: one year
This simple to use machine heats up impressively quickly. It also produces barista quality coffee and is easy to clean. If you are interested in buying this machine you can take a look at the latest prices.

All of these machines are capable of producing high quality espresso at an affordable cost.

24 March 2016

Installing granite countertops

This photo was taken from Caesarstone Canada official site 

Installing granite countertops isn’t exactly a simple process, but it’s not terribly difficult either. There are a number of basic steps to follow that can all but guarantee you a result you’ll be thrilled with.

It starts with a visit to a counter fabricator’s showroom. Do an internet search for granite fabricators in your area and you’ll find more than a few of them. A granite fabricator has the equipment and the experience to work with not only granite, but other materials such as quartz composites and solid surface materials too.

Once you’re at the fabricator, you’ll see many slabs of the material you can use for granite countertops they have on hand and you’ll notice that their materials when in slab (uncut) form are grouped by color. You’ll find that helpful because the first decision you’ll have to make is the color of your counters. Deciding on the pattern of that color comes second, after you’ve narrowed down your color choices.

At the fabricator too, you’ll see the sink options you have available as well as a selection of faucets. It’s usually less expensive to buy sinks and faucets from a fabricator than it is to buy those same components from a plumbing wholesaler.

If they’re not clearly labeled, ask to see what edge options for your granite countertops you have to choose from as well. 

After you’ve made your selections, ask to set up an appointment for a template.

Custom granite countertops cannot be made ahead of time, they’re always made from a template of the cabinetry where those counters will be installed. It takes a little longer this way, but it’s only then that you can be sure that your new granite counters will fit perfectly.

Your estimate will always include labor. It’s only a qualified installer who knows how to install granite countertops.

Once your new granite countertops are installed, follow the installer’s directions exactly once they leave. In most cases, you won’t be able to use your new counters for a day or so after they’ve been installed. Your fabricator and installer will also have some useful tips and products to help keep your new countertops looking new for a very long time.

Once you’ve gone ahead and had your new granite countertops installed, take a breath and enjoy them. They’re a beautiful addition to any home and not only that, they add real value when it comes time to sell your house.

17 March 2016

Why is the drain gurgling and slow to clear?

via

If a drain is clear and clean then water should clear quickly and without any noise. If the water is taking longer to clear down the drain than normal, and you can hear a gurgling noise after you have used the sink or shower, then you will need to check for problems if the drain or with the vent pipe. You should never ignore a problem like this, because chances are it will only get worse. If you are at all concerned about noises coming from the drains then you can make a choice to call a professional, like an emergency plumber. They can help deal with the problem and put your mind at rest. We are going to take you through the causes of a gurgling drain that a plumber may discover.

A build-up of grease and grime

The most obvious reason for you to hear gurgling noises, and notice the water is disappearing faster than usual, is a build-up of grease and grime in the drains. When the drain is clean both air and water can flow down it freely; this does not happen when a drain is clogged. This can happen in individual drains in your home, or in the main pipe for all the drains. You will be able to tell if the main pipe is involved if the noise is present for any drain. It’s a good idea to try and prevent items such as oil, grease and hairs from going down the drain in the first place. However, if a blockage does happen you can try and remove it by pouring boiling water down the drain (only if you have metal pipes; for PVC pipes use hot water). If this is not successful you can try using a plunger or a drain snake to solve the problem.

 A blocked vent pipe

 If the vent pipe for your home is blocked this can cause you to hear gurgling noises. The vent pipe connects to all the pipes in your home and vents out through the roof. Problems can occur when debris gets into the vent and prevents air from getting out. The air has to go somewhere and will usually try and escape through the last part of the system that was used, such as a kitchen sink. This escape results in the gurgling sound. If you think you have a problem with a blockage in the vent pipe for your home you should call a professional plumber to take a look for you.

These are the main reasons why you may hear a gurgling noise after you use the sink or the shower. If you experience these problems then you call a licensed plumber to help. They will be able to take a look at the problem and resolve it for you, giving you peace of mind and getting your plumbing back in full working order.

25 February 2016

What you need to know about pest control in the kitchen

via

No room of your home is immune to pest infestation. You may not like the idea, but your kitchen could be especially popular with pests because there is a potential food supply close at hand. If you discover a termite and pest problem in your kitchen, or any other room of your home, you may need to carry out certain actions before the pest control experts arrive.

If you hire a Wheaton exterminator to deal with your pest problem you should ask for advice about what you will need to do in preparation for the extermination taking place. In the meantime, we are going to take you through some information that you may find interesting to know.

Making sure your kitchen is prepared for the extermination process

If you are having extermination work carried out in your kitchen you will normally be required to empty your kitchen cupboards. You should always make sure that the contents of the cupboards are stored in another area of your home, under a covering. Once you have emptied the cupboards you should clean them out.

Doing this removes any traces of food which may serve as a distraction to pests and reduce the effect of any baits that are put in place. It’s also worth remembering that you will not be able to clean any of the cupboards directly after the extermination process as to do so could adversely affect the treatments used.

It’s worth noting that for certain treatments, such as that for an infestation of spiders, the process you need to follow may be different as any webs will normally need to be left intact.

Action to take in the rest of your home

It’s often not just your kitchen that requires treatment during the extermination process. In any area of your home that is being treated you need to make sure that the exterminator has full and unrestricted access. You should always make sure that the floor space is clear. There is a particular process that you need to follow if you have an aquarium in your home which is too heavy to be moved.
You should ensure that the aquarium is completely sealed and that you have switched the pump off. Obviously, the fish cannot be without a pump for very long so if the extermination is going to take a long time you need to find a way of filtering air in from outside of your home.

These are probably not the only preparations you will need to make, prior to the arrival of the exterminator. You should always ask the pest control expert you have hired about what they need you to do. Once you have confirmed what preparations are necessary you should always make sure you have enough time to complete them. You do not want to end up rushing so always start early clearing your kitchen and any other rooms that are being treated.

23 February 2016

Six kitchen counter ideas

via
Choosing the right kitchen counter is extremely important. After all, you use it on a daily basis, and if you don’t pick one that’s durable enough for your needs or that matches the look and feel of your home, you’ll regret it for a long time. Thankfully, there are many different kitchen countertop options for you to choose from, and the following detail them for your so that you can make a better, more informed choice.

Laminate
Laminate is a traditional countertop. Many people are trying to get rid of laminate, though, because it does look a bit dated. However, many upgrades have been made that give laminate a classier look.

Check out my post on laminate sinks from 2011. You can get this in a variety of styles and colors, and you can even find some that will give you the look of a stone without the price tag.

Stone
Stone is a popular countertop choice. Many homeowners are opting for granite countertops, marble, or soapstone because it gives a seamless and classy look to the house. Plus, these come in many different styles, so you can easily find one that fits your specific needs and tastes. There are differences between the different types of stone counters, so you should always connect with a specialist to ensure you’re making the right choice.

Butcher Block
Butcher block is  a timeless option for countertops. Pair this with a Hahn farmhouse sink, and you’ll have a truly unique look that you’ll love for years to come. Butcher block is extremely durable, so you can do all your cooking and baking on this material without worrying about long-term effects. Plus, it’s extremely easy to maintain, and it will last you for a very long time.

Stainless Steel
Most people don’t think of stainless steel as a countertop option, but it’s a great choice. This can create a rustic and classic look in a kitchen. However, it’s important to note that stainless will show dents and dings, so if you’re a perfectionist, this may not be the right countertop choice for you.

Concrete
Concrete is another popular countertop choice. It’s extremely durable and very cheap to install. Plus you can count on it to last you a long time. It can be left untreated for a rustic look, or you can have it stained or polished to give you a specific look and feel. You could even have it stamped if you want to create a different illusion.

Tile
If you want something cost-effective, tile is a great option. You can pick any type of tile you want to make it match your home’s style and dĂ©cor, and tile is durable and waterproof, which is great for  a kitchen environment. However, just remember that tile requires mortar, and this can be hard to clean.

Choosing the right countertop is something you need to think about. Make sure you look at all your options and think of your needs in order to make the best choice.

20 February 2016

Unconventional Ways to Find Interior Design Inspiration

via

You want the rooms of your home or office to speak to your tastes. But what are those, exactly? In an effort to get inspired we often jump the gun and start with things like favorite color or a style we’re vaguely familiar with. Soon our best intentions turn into mismanaged approaches and the result is a less-than-ideal look to your interior space. We’ve all been there before.

The obvious first step is to try and think like an interior designer. However, DIY interior design doesn’t need to be all dense theory and academic absorption. Inspiration can and ought to arrive in all sorts of ways. The following are just an example of some of the many unconventional methods to achieving desired interior design:

  • Look through homes for sale in other parts of the world. For example, San Diego real estate listings are sure to offer a glimpse into one-of-a-kind forms of architecture and interior design. Color combinations, use of space, and application of light are all things that can be seen in photos meant to try and sell a home. While your budget may call for a scaled down version, looking through the swankier listings will showcase the most original interior design styles to draw inspiration from.
  • Pay attention to art direction in movies and on television. Film and television studios pay good money to make sure the sets and scenery look perfect. Sometimes this means making sure the underbelly of a viaduct has just the right color scheme of spray paint, but most of the time it means making sure an interior space is in harmony with the production’s color palette. This typically leads to immaculately executed interior design styles, especially if the filmmakers are particularly known for striking visuals. Take notes when you like the look of a room in your favorite TV show - a lot of work went into making it look good and you can base your own approach on the design.
  • Go beyond the basics. Let yourself be inspired by animals, paintings, cars, or even music - it doesn’t simply have to be space, wall color, and furniture found elsewhere. The aforementioned array of graffiti along the walls of concrete canals can even serve as a launching pad for the mind. It may sound hippy dippy, but such an approach is how many successful interior designers choose to work.
  • Dreams: write them down. Some people have vivid dreams in terms of locale. This is particularly the case if interior design is weighing heavily on your mind during your waking hours. Keep a sketchpad and 120-count box of crayons by the bed and draw out (the best you can) any memorable looking spaces in your dreams. While you might end up passing on the octopus tentacle ceiling fan blades and the shag carpeted walls, you might find just the look you were wanting all along.


We all want to pull off professional-grade interior design when attempting to 'do it ourselves.' However, it’s easier to end up with a pedestrian look to a room than something spectacular when we opt to go at it alone. Too much energy is forced on trying to make inspiration happen, rather than letting it happen. Go out and take in the world to find interior design which suits your taste and budget.

19 February 2016

Top Home Design Trends to Look for in 2016

via
With a solid economic recovery underway and renewed consumer confidence, the housing market is predicted to continue strong in 2016. Among the real estate trends we’ll see in 2016 is a growing interest among home buyers in building a new home versus purchasing a resale home. By choosing a new construction home, buyers have the chance to customize and create a home that is the perfect match for their family and lifestyle. So what design choices will be popular in 2016? Check out the list below to see the top trends in new home design.

Style

Many new home buyers are looking for a contemporary or modern design in their 2016 home. Although these styles have unique elements, both favor simple and uncluttered spaces, the use of simple, neutral colors, clean lines, and decorating that adds a pop of color and artistic flair.

Another overall style trend is the importance of personalization and customization in 2016 new homes. Home builders are showing off their craftsmanship with stunning staircases, custom built-in shelves and other fine details. Homeowners are also personalizing their homes by taking risks with bold paint colors, wallpaper, and patterns.

Layout

In 2016, home builders will continue to see the open concept floor plan the most desired layout among home buyers. This layout opens up the main living space so the kitchen, dining, living and entertainment areas all flow together. This layout is perfect for entertaining and bringing families together.

Overall, the layout of 2016 new homes is set up to have 100 percent usable space throughout the entire home. This means clean design, fewer hallways, a single staircase, and no tiny, wasted rooms.

Kitchen

In 2015, the biggest kitchen trend was white everything, including white cabinets, walls, and countertops. While white will still be a top choice in 2016 new homes, the latest kitchen color trend is now gray, which can be used in everything from cabinets to backsplashes. Combining white and gray will also be very popular in 2016.

With the open concept floor plan, the kitchen will be the center of entertaining, cooking, and dining. This will lead to a high demand for larger islands that provide more space. In fact, those who have enough room are choosing double islands, either back to back or side by side. This allows you to have one designated area for prepping and cooking, and a separate space for dining and socializing.

Bathroom

Although many new homes will have more than one bathroom, the bathroom that is getting all the attention in 2016 homes is the master bathroom. In addition to a beautiful retreat-like bedroom, homeowners want their own personal bathroom to enjoy after a long day.

In the bathroom, we are seeing a transition away from bath-shower combinations into single units. Some homeowners are choosing large walk-in showers decorated with beautiful tiling, others are choosing stand-alone spa-like tubs, and those who have room are adding both for convenience and ‘wow’ factor.

Other Rooms

Beyond the other typical rooms of the home like kitchens, bathrooms, and bedrooms, home builders are noticing an increasing number of requests for bonus rooms. This includes:

  • Wine rooms and bars where the homeowner can nurture their love of wine and spirits with professional amenities.
  • Home offices, which reflects the fact that many people now work from home or telecommute on some days.
  • “Get away” rooms, which offer a place for relaxation, recreation and family time. Get away rooms can take many forms including entertainment or media rooms, libraries, formal living rooms and more.


Outdoor Spaces

As we mentioned earlier, home buyers who are building a new home in 2016 want to make every inch of their space functional, and this includes the outdoors. Because of the growing importance of at-home entertaining, new home builders are seeing requests for indoor-outdoor living spaces. For example, the main level may have a two or even three-panel sliding glass door that provides a view of nature. The glass doors may then open to a patio that is perfect for entertaining, and it may include other extras such as outdoor kitchens, fireplaces, or pizza ovens. All of these design choices are made to create a seamless flow of indoor and outdoor spaces and to maximize functionality.

With the trends featured above, it’s easy to see why home buyers entering the market in 2016 are strongly considering building a new home over buying a resale home. By gathering your ideas and contacting your local home builder, you can truly create the home of your dreams.  

03 February 2016

Can you paint your house any color you want?


Making a decision on what color to paint your property is an important task; after all once it’s

done you don’t particularly want to be struck with a change of heart and have to start all over

again. Painting the outside of a property is a big job and starting from scratch would take far too

much time and effort. That’s why it’s important to make a solid decision on a color scheme before

you start painting your home.

One of the questions you may be asking yourself is can you paint your brick home? The answer is yes you can; brick can look great when painted, as long as you follow the right process. Any exterior

surface of your home can benefit from a paint job, but you have to take some points into

consideration when choosing a color.

Are you free to choose whatever color you want?


This is the main theme we want to address here. The question does not just apply to “can” you

choose a certain color, but also to “should” you choose it. There are certain areas and housing

associations which impose restrictions on colors that can be used when painting the exterior of a

property. The first thing that you need to do is check that none of these restrictions apply in your

area. If they do then you are going to be restricted in your color choice.

Even if there are no restrictions, you may want to give some thought to the type of area you live in.


If your home is located in an area of historical significance, where homes stick to certain color

schemes, it may go down too well if you paint your home bright yellow. It may be a bright color that

reflects your personality, but does it really fit with where you live?


What color should you choose?

Once you have discovered that you have complete freedom of choice when it comes to painting

your property, you then have to decide what color to opt for. One of the main deciding factors is

going to be whether your property is a home or an investment. If you want to settle in the property

then you will probably want to put your own stamp on it. If the property is more of an investment

then you want to stick to a clean and neutral color scheme that makes it easier to sell the property

on.


You may also want to take a look around you and see what colors your neighbors have opted for.

Sticking with the same themes or shades is often a good idea. You may be thinking that you want to

stand out and be individual. There is nothing wrong with that, but you may have to be prepared for a

backlash. You also have to decide whether you really want to spend years living in a home that is a

talking point for everyone, or would the novelty start to wear thin after a while.

There is a lot to consider when you decide to paint the exterior of your home. It’s important to do

your research and spend time making a decision in order to save yourself problems and time in the

long run.

Can you paint over a water damaged ceiling?


A water damaged ceiling looks unsightly and the water can cause drywall to become loose. Both of

these problems obviously need to be addressed. The good news is that you can get rid of that ugly

water damage stain on your ceiling; it just takes a little bit of effort and knowledge.


We are going to take a look at what steps to take when painting a water damaged ceiling. This

includes the attention you have to pay to repairs that may necessary as a result of the water

damage. One thing it’s important to note before you start is that you need to ensure the source of

the water damage has been located, and the problem dealt with. You don’t want to do all of this

work only for the water damage to re-appear.


Check for loose drywall


In the case of a more serious leak there is every possibility that the water may have caused the

drywall to become loose from the joists. If this has happened the problem obviously needs to be

resolved before any painting is done. It’s easy to test to see if the drywall is loose; all you have to do

is give a gentle push in the area of the stain. If you can feel that it’s loose you will need to take some

drywall screws and fasten the panel back in place.


Check for any cracks 


It’s also possible that the presence of water may have caused cracks to form. If this is the case you

will need to fill in any cracks with spackle and allow it try dry for the recommended amount of time.

After it has dried you will then need to sand the area down.


Remove any mold


There is a chance that you may find mold on the stain caused by the water damage. If this is the case

you will need to remove the mold with a bleach solution, before letting it dry.


Use primer first


You can’t just paint directly over a water damage stain and expect it to disappear. After you have

made sure the area is repaired if necessary you then need to use an oil-based, quick drying primer.

Using this first means you will then be able to easily paint over the stain.


Painting the stain


Once the primer is dry you are able to paint the area. You should use water-proof paint that matches

the color of the original paintwork. Make sure that you paint using smooth strokes and that you start

dabbing when you reach the edge of the stain; this helps the paint to blend. You should apply two

coats.


If you carry out all of these processes then you should be able to paint over a stain that results from

water damage. It takes a little time and effort but you will soon have a ceiling that looks as good as

new again.

04 January 2016

How long is it okay for an air mattress to be inflated for?


How long you want to keep an air mattress inflated for is going to depend on your reason for using it in the first place. The only time you will really want to keep an air mattress inflated for any length of time is if you are using it as a replacement for a solid bed. If this applies to you then you may be wondering what the rules are regarding inflation and deflation.

You will find lots of useful information if you check out the latest air bed reviews. What you may not find is any details about how long you should leave an air mattress inflated for. This is because manufactures don’t generally have any rules or suggestions for this. We are going to give you a few tips to consider, to help you out.

What problems could keeping your air mattress inflated cause?

The vast majority of people purchase an air mattress as a temporary sleeping option in their home, or for use while camping. If this is you then you probably won’t want to keep your air mattress inflated for any significant period of time. However, if you do need to use an air mattress for a longer period of time then there are some things you should be aware of.

The first thing we should point out is that there is no actual recommended time limit for keeping an air mattress inflated. The main problem with leaving your mattress inflated is that there is more chance of an accident happening if you do. If you have children or animals in your home, they can be boisterous. It’s all too easy for them to cause damage to an inflated mattress without intending to.

What could happen if you inflate and deflate an air mattress often?

If you are using an air mattress for an extended period of time then you need to consider both sides of the coin. While you may be exposing your mattress to damage from cats and dogs by leaving it inflated you may also cause damage if you constantly inflate and deflate the mattress. Although  air mattress are obviously designed to be inflated and deflated, completing these actions all the time can put excess pressure on seams. As you can probably imagine this is not a good thing as it can lead to the seams bursting. This in turn can lead to you having to repair or replace your air mattress.

Overall, if you are using an air mattress each day it probably makes sense to leave it inflated. If you decide to do this then you should try end keep the mattress away from any potential sources of damage. If you can manage to do this then you should not encounter any problems, except having to top up the air when the mattress naturally deflates a little over time.

18 December 2015

Tips for Preventing Household Pests

via

You know you have to share this planet, but sometimes it’s nice to have a space of your own. Even the smallest of housemates can be a nuisance, and insects have a way of getting into your home whether you want them to or not. Harsh repellants and pesticides can damage your air quality and can lead to respiratory irritants. Fortunately there are some common sense preventative measures you can use to reduce your risk of an infestation.

Household Cleaning

Vermin are attracted to sources of easy food. When you leave crumbs and spills out in the open for too long, you are inviting unwanted guests over for a feast. In addition to cleaning up messes in the kitchen, you should also avoid leaving open trash containers sitting for too long.
Vacuum regularly to clear up dust and contaminants. Clean up your furniture by lifting the cushions and removing debris and dust that has fallen in the cracks. Also try to keep food in areas that are specifically designated for eating. Restricting eating habits reduces your exposure to vermin throughout the rest of your home. Also, check your food cupboards regularly and discard any open containers that have sat for too long.

Home Maintenance and Repairs

You need to seal off all points of entry. Insects are small enough to wiggle their way through the tiniest of cracks, so it is important to restrict their access as much as possible. An annual exterior inspection of your foundation can help to identify areas where termites, cockroaches, and ants may invade from. Torn screens and improperly sealed window panes are points of entry for mosquitoes and flies.

Alternative Lighting

Some insects are confused by sources of light. As nocturnal creatures, their survival depends on their ability to remain hidden in the shadows. Certain varieties will respond to light by avoiding the area. If you have found a point of entry into your home that you have not successfully sealed up, try installing a small, low-voltage light near the area. Some aluminum foil also helps to reflect light and causes confusion.

Control Temperature and Moisture

Humid and warm environments help termites, roaches, bedbugs, and other parasites to do more than just remain active. They breed and multiply rapidly. It is essential that you keep your home as dry and cool as possible to discourage their activities.

Fix leaking water pipes that run under your house. Water damage is a serious enough cause for concern, but extra moisture is inviting to pests. As insects absorb the moisture through their bodies, they are able to travel farther and cause more trouble.

Wipe up spills as soon as they occur. Open your windows and doors regularly to allow trapped humidity to escape. You should also launder wet towels and avoid leaving laundry to sit for too long. In some dry climates, humidifiers may improve your personal comfort, but avoid using these devices for prolonged periods. Get in the habit of turning the thermostat down when you are away from home. Not only does this help you to save on your power bill, the varying temperatures discourage insects from coming indoors.

Always Check for Hitchhikers

Bedbugs, fleas, and other parasites often catch a free ride into your home. Pets may bring these vermin indoors where they can attack the rest of the family. Routinely bathe your pets with a shampoo that is specially formulated to remove insects. If you have stayed overnight at a hotel, you are at a higher risk for bedbugs. Make sure you check your suitcase and personal belongings for any signs of infestation before you get home and unpack.

You may not be able to eliminate every insect from your home, but you can reduce the risk of becoming the target of an infestation. If you have already adjusted your habits and are still struggling to control an outbreak, contact a professional exterminator for help.

23 March 2015

Every chef deserves the right kitchen sink


When it comes to food and cooking habits, Australia’s early indigenous history l has a great influence on what people eat every day. An whilst hunter gatherer diets such as bush tucker are now a less common occurrence, being replaced over time by the influence of British colonization, the culture of outdoor barbecue cooking is still a very prominent aspect of Australia’s food culture. However, modernization and multiculturalism have brought Australia a diversity of new cooking habits which have brought people back to the art of indoors kitchen cooking, popularizing the use of pan and oven cooking.

A country rich in fresh produce

With its climate, land and sheer size, Australia is a land where fresh produce is readily available. The coastal areas are rich in fish and other seafood products, and the inland sees the seasonal growing of many vegetables, including cucumber, asparagus, cauliflower, tomato, peas, mushrooms and many more. This diversity has given birth to a culture of stir-frying and steaming lean meats and vegetables. Australia is also known for its fruit growing culture, especially known for being the birthplace of the famous iconic apple: the Granny Smith.

Australian drinking

Whilst beer is often seen as Australian’s drink of choice, the country has a huge wine making culture. This is because the land and the climate allow for the growth of well ripened grapes, producing rich, fruity and often slightly higher in alcohol wines. Red wine varieties such as Shiraz and white wines such as Chardonnays are among the many wines Australia’s land has to offer. And as well as the love for tea drinking, brought along by the British colonization, another very popular drink in Australia is coffee, brought along by the immigration of Italian and Greek population over the past 100 years.

The need for a good kitchen

Just like any other country, Australian homes deserve a good functioning kitchen. This is necessary for the cooking of all the diverse ingredients the country has to offer. There is always room in the garden for a good barbecue but when it comes to food preparation, indoors is where it is at. The Australian climate can be too hot to leave foods outside, so a cool temperature kitchen is essential for the preparation of all those lovely dishes.

Keeping it clean and hygienic

Because of the hot climate, insects and other animals can still make their way into people’s kitchens. This is why hygiene is very important in an Australian kitchen. The sink is the central hub of cleanliness in any kitchen, it is essential to washing our dishes, cleaning our foods, keeping our hands clean and maintaining the hygiene levels to a good standard. The sink is one of those aspects which is worth investing into as it will be a central part of our cooking for the rest of our lives. Looking online, kitchen laundry sinks from abl are some of the best ones to buy in the country, offering a variety of choices, from beautiful designs to practical sizes where all kitchen hygiene needs can be met. After all, a clean kitchen is a good kitchen.

17 March 2015

Practical yet stylish bathroom design ideas

Image by Ines Hegedus Garcia, Used under a Creative Commons license.

Deciding to renovate or redecorate the bathroom is considered by many to be a difficult and demanding task. Some people believe it takes a lot of exertion and a large upheaval to make any real difference to the room’s look and feel.

However, there are quite a few practical yet stylish changes you can make, which have the potential to transform any bathroom. Best of all, they don’t require much time, effort or money either.

Put up some shelving

This might seem like a straightforward step, but it is surprising just how many people don’t put up shelves in their bathroom. In addition to improving organisation, shelving units can be incredibly decorative too. Floating shelves look clean and crisp, but ornate options will suit more traditional bathrooms.

Introduce more storage

Certain bathroom items can be rather unsightly and not very attractive, which would be better hidden away. This is a great opportunity to enhance the room’s aesthetic, so think about introducing storage containers such as glass jars for cotton swabs or wicker baskets for toilet rolls.

Change the cabinet

If you don’t have the budget to update your entire suite, consider changing the cabinet instead. This piece of bathroom furniture has the potential to revamp and rejuvenate any tired looking space but isn’t that difficult to fix-up. What’s more, it will increase practicality and improve overall tidiness.

Upgrade the small details

It is easy to overlook things like towel racks, toilet roll holders and sink taps, but if you upgrade these small details, you’ll end up with a much more decorative bathroom. Even if you don’t have these furnishings in the first place, it will undoubtedly increase overall functionality anyway.

Improve the sights and smells

There is nothing quite like taking a nice relaxing bath after a stressful day. But this can be improved even more by adding some scented candles, which smell great, create the right ambience and reduce your energy footprint too.

Put up more mirrors

This is a really good idea if you have a small bathroom, as mirrors can make a confined space look much larger. On top of that, adorning and alluring mirrors are bound to enhance your bathroom’s appeal while providing greater functionality at the same time.

All of these design ideas are sure to be within most budgets and don’t require much work or effort to complete. But most importantly, they’ll improve the style and practicality of your bathroom and day to day living.


10 March 2015

A guide to a super cheap bathroom

Whether it’s making your home a more comfortable place to live, trying to make it more valuable with more energy or elegance, or just simply you want to make yourself feel happy, these projects of super clean bathroom remodeling are the key element and are the most economical way that you can make your bathroom clean with ten times the cash that you would have spent in some luxury bathroom shops buying new bathroom interior.

When it comes to the elegance and the cleanness of your bathroom, there are several ways of making the difference in it, and few of those are the lightning, painting, wall decoration and assents, the main bathroom mirror which is usually present in the bathrooms around the world, followed by the curtains over the bath tub and the linens.

The first thing in any cheap bathroom remodeling and making it look amazing is the paint. The paint must be done in neutral shade and colors, and the energy should come from the accessories that are placed there later on, not from the paint itself. Even if this is the case with the paint being the second background color of the bathroom, don’t underestimate the power of it because it gives the shininess of the other elements by being the contrast itself.


Next money spending step are the fixtures with new lightning that should be placed on the wall once the paint is dried. Wattage is needed because your light determines the happiness that you will place inside the bathroom. Aim to focus is where you plan to put the mirror for double light due to the reflection. The lights are not something that you can remodel and clean to look cutter. This is where you should spend some money and at the end of the long run they will definitely pay off.

Towel racks and light switch covers should come after the lightning is placed. Aim for white or chrome because it’s the color of the century, and it makes the bathroom look elegant. These accessories are not so expensive so go for the kill. They can be found in any shop for bathroom accessories.


Mirror and everything else is next as the last step of the wall decorating. This is the main bathroom element including the interior so we suggest you watch a tutorial video on how to reuse your old mirror and make it look amazingly new, as well as how to place the mirror in the bathroom so it can get the maximum out of the lightning that comes from the window, and the artificial lightning that you have previously set in the bathroom.

Shower curtains are a cheap element to replace and a fun one as well. Aim for live colors that contrast the walls, and with no doubt at all your bathroom will look fresher and cleaner, while you won’t have to spend much time and money on it. Natural material curtains are the best way to go because they are cheap and soft, and for this matter, look for cotton duck.

Linens should be the same color as your bathroom shower curtains and if your shower curtains are white, beige or cream, your mat and towels should also share the same color and intensity. The last accessories like toothbrush holders and tissue boxes should be white as well, if your curtains are white. Some may way that this is a classic and a color that has already been used many times before, but the thing is that white color is one of the cleanest colors and the best looking one for a bathroom. Not to mention that it is the cheapest color on the market.

We hope that this small cheap bathroom remodeling guide helped you and your idea of remodeling your bathroom while saving you cash.

09 March 2015

Stop energy leaks cold

Did you know that half of all people in the US spend 20% of their income on energy costs? That's a huge amount of money and by insulating properly you can decrease the amount of money you spend and get yourself on the right side of those statistics.

 
Via: Spray Foam Insulation Kit Manufacturer

02 March 2015

Gettng the right sized heater for your patio space

via

The outdoor living areas within your patio and garden provide you with the best moments of solitude and relaxation due to the natural openness and closeness to nature. However, at some points in the year, it gets too cold for you to enjoy the serenity of these places. During this time, you need a way to make your patio as cozy as possible so that you can still get out there and enjoy it. The solution in this case is a patio heater. While buying this device, you have to make certain considerations in terms of the space available as heaters come in a wide range of sizes with different specifications. If you’re looking for the right sized heater for your patio space, then look no further. We’ve put together some information on sizes of heaters for different fuel sources so you will find the decision much easier to make and you’ll be able to get the perfect heater for your outdoor space.

Gas patio heaters
Gas heaters use propane as fuel most of the times. They are popular because of their ability to heat up a place very quickly. Since these appliances use gas and need to have a gas tank, they tend to be very big, and come equipped with propane gas tanks that can hold as much as 20 gallons of gas. These types of patio heaters come in handy when you intend to heat a large area. However, they are unsuitable if you have space limitations. For them to work uniformly, you need to place them right in the middle of the area you intend to heat which can prove problematic in smaller spaces. Over time, space issues have led to manufactures designing smaller, tabletop patio heater versions that are a bit more practical in terms of size but still they usually don’t look quite as discreet as their electric counterparts. You can place them on the patio table or mount them on the walls of the room, or even the ceiling. However, many homeowners feel these options place the focus on the heater, rather than having it blend in with their patio.

Electric heaters
There are a wide variety of different electric heaters that come in a variety of different sizes. One standout feature is the fact that they do not need any fuel as such, as they are powered by electricity. This means that you do not have to worry about a huge gas tank clamouring for space with other items in your patio. In most cases, electric heaters are mounted on the wall and plugged to a power supply. You can always direct the heat where you want it most when using these appliances. In addition to this, you can control temperature levels depending on the amount of heat you require. Electric heaters include the classic type, convective panel heaters and under desk heaters. The Thermofilm range of heaters are innovatively designed to fit smartly with any patio or garden space, and you won’t find space an issue. Worth a look if you’re a little short of space.

An electric heater is far more space considerate than its gas counterpart. However, some gas heaters are more energy efficient. What you need to look for, particularly if you either have a small space or do not want your heating to be an eyesore is a company who specialise in offering bespoke heating solutions to a variety of different spaces. Getting the right heating will certainly help to ensure you can enjoy your patio or garden space without having to step over cables or look at ugly heating elements.

20 February 2015

How much should you spend on redesigning your kitchen?


The past few years have seen the kitchen grow in importance, in comparison with the rest of the house. Today, people eat, gather, and even have parties in the kitchen. Larger kitchens have replaced the small, basic ones with conveniences such as larger sinks, islands, fancy lighting, beautiful refrigerators, cookers, and so on. Most homes have picked up on the cozy, social kitchen trend. But how much should you spend on redesigning your kitchen?

Creating A Budget

After conducting thorough research on the re-designing options for your kitchen, it is time to consider your budget. The following tips will help you estimate more accurately.
When planning, decide what exactly needs to be done. Your decision will place your project in one of two remodeling categories:

Minor Remodels

Minor remodels average at around $17,000 to $25,000. These are usually done when a  kitchen has a good layout, or its plumbing and electrical systems meet the current building standards. However, the finish may be outdated and needs revamping. The design, in this case, will remain identical to the original, and it will mean you change the cabinets, flooring, ceiling colour and worktops.

Major remodels

Major remodels are far more costly. Mid-range projects in this category average at around $50,900 to $59,700 while high-end projects average at around $103,500 to $115,500. Due to poor planning during construction, some kitchens require significant updates or repairs, and expansion in size, hence the sharp difference in cost between the minor and major remodels.

After determining what your kitchen needs, coming up with a budget that will cover your expenses becomes less daunting.

Break down the Costs

Come up with an easily comprehensible way of breaking your budget. On average, you can break down your budget – as a percentage of the total amount – as follows:


  • Cabinets: 35 percent,
  • Appliances: 20 percent,
  • Labour: 20 percent,
  • Windows: 10 percent,
  • Fixtures: 5 percent,
  • Fittings: 3 percent,


Prepare for the Unexpected

Something unexpected always happens during construction – especially in older residences. For example, on ripping out your walls, you may realize that the electrical wiring is outdated, or that your floor has rotted after pulling out your dishwasher. Leaving about 20% of your budget to cover the unexpected is practical.

List what You Consider most Important

List what you feel needs revamping the most. If you feel that new appliances will give your kitchen the most pleasing restoration, ensure that they are at the top of your list. This way, even if the cost supersedes your budget, you will have taken care of what is most important to you.

Acquaint Yourself with the Charges Design Professionals Demand

Design professionals can take your project from conceptualization to selecting the finish materials for your construction.


  • Architects charge, on average, $150 per hour and above, or a flat fee of about $500 to $5,000,
  • Interior designers charge an average of $100 to $150 per hour or a flat fee of $500 to $10,000, and
  • Kitchen designers charge $50 per hour.

Of course you should shop around for this. Some kitchen builders in Melbourne offer free design consultations along with their services.

You should also acquaint yourself with the charges that your local buildings permit office requires for such a demolition. Some areas determine their fees basing on the planned work while others require you to pay a percentage of the total project.

Your kitchen reflects your lifestyle, and spending money on it gives you the chance to get a kitchen you’ll love to be in, whether to cook, socialize or relax. Since a cozy, social kitchen is the new trend, revamping your kitchen should be among your top priorities if you've the budget to spare.

13 February 2015

Tips for making a kitchen renovation less stressful

via

Let’s face it – redoing the kitchen is not a fun job, and it can be so stressful in fact that many of us choose to put it off for years, and instead endure a kitchen we hate rather than putting up with the hassle.

However, if you take some steps you can make the task considerably easier and a lot more stress free. Here are some tips for doing just that.

Preparation is key

From things like setting a budget early on and having a time frame in mind, getting prepared will be really useful when it comes to keeping things organised (and keeping calm!). As well as thinking about these sorts of things, also get the actual room and the rest of your house prepared. This will include doing things like totally clearing out the existing kitchen of things you no longer want in there, and ensuring work people can have easy access to the space when it comes to things like bringing in your large, new appliances.

Consider your new appliances as wise investments

Renovating a kitchen is rarely a cheap venture, but it’s such a good idea to not skimp on your new appliances, as treating them more as an investment is a much better idea in terms of getting more for your money. If you go for cheaper options from the beginning, you may end up replacing them sooner than you’d wish which will end up costing you more anyway.

...and get rid of your old ones easily

Getting rid of your old, existing appliances to make room for your brand new ones can feel like a bit of a mammoth task. However, there are a number of options out there that will take away the hassle (literally). From companies taking away your old ones in return for discounted new ones, to companies offering to recycle them for you, there are lots of things to look into. You can check out this website - http://www.serviceforce.co.uk/services/recycling/recycle-electronics/ – for more info on the latter option.

Get your agreements in writing

Finding trusted trades people isn’t always easy, though when you do find someone, it’s recommended that you get all of your agreements in writing for the jobs that they’re going to do. That way, you’ve got written, physical proof of what you were expecting, should there be any issues that you need resolving along the way.

Install plenty of power points

This isn’t generally something that people forget, but it may be something that we rarely install enough of. Your kitchen will be one of the main rooms in your house when it comes to electrical usage, so it’s a really good idea to ensure you’ve got loads of plug sockets installed so that you have more than enough for when it comes to using your new kitchen.

Go green where possible

Being environmentally friendly is a goal that many of us want to achieve, and if you’re redoing your kitchen, you may want to look into ways in which your renovation can do this. Here are some tips for going green in the kitchen.

Is it safe to be in a property while it is being treated for pests?

via

Pesticides can be dangerous if you use them the wrong way, so it’s often necessary to call in the experts if you have a problem with pests in your home, or of you want to prevent a problem from occurring.

Pest control experts know what they are doing, and they know what extermination processes and methods to use for different situations. As long as you take the necessary actions before, during and after the treatment process, you and your family will be perfectly safe.

What should you do before your home is treated for pests?

The most important thing is to make sure that the professional you hire is licensed. This means that they will be able to complete a safe and effective job, and will be able to advise you correctly on precautions to take. States have their own individual licensing procedures, with the Environmental Protection Agency, providing training in the handling of certain pesticides. Once you have made an appointment it’s important to make sure that the area to be treated is ready for when the pest control experts arrive.

If you are having a routine treatment completed then, most of the time, this is concentrated on the exterior of your home to prevent pests from getting inside the premises. Interior pest control is usually used when pests have actually been encountered indoors. If the exterior of your home is being treated then you need to make sure that the area is cleared, that grass is cut if necessary and that children and pets are removed from the area.

Similarly, if the interior of your home is being treated, you need to clear any small items from the floor and put away any food items; you should also cover any fish tanks and either cover or switch off the pump. When the Long Island pest control experts arrive you will often need to vacate your home, depending on what pests are being dealt with.  Children should always be out of the premises while the work is being undertaken, and it’s a good idea to make sure pets are too.

What happens during the treatment?

When your home is being treated for pests low levels of pesticide are used which are lethal to pests while not threatening the health of you or your pets, once they are dry. There are different treatments available depending on the pest involved. For instance, aerosols and dusts can be used for applying to cracks. This means that the pests can be killed, but there is no harmful reside.

When a pesticide has to be applied to a surface that’s exposed the experts follow very specific procedures to ensure that the right quantities are used in the correct manner. Application of these pesticides also dictates that all animals and humans must stay away from the surfaces until they are dry.

What happens after the treatment?

Recommendations vary as to the length of time you should stay out of a home that has been treated, except to say that you should not touch any treated surfaces until they are dry. You should ask the experts undertaking the job whether it is necessary to stay out of your home, as this can depend on the type of treatment undertaken.

If you have any concerns about re-entering your home then a period of 2-3 hours is definitely sufficient for any treated areas to have dried out. After this time you can enter your home with complete ease of mind, and no pests to worry about.

09 February 2015

The benefits of outdoor gas heaters


Do you want to throw an outdoor party during the winter season? Whether it’s for a birthday, or special event, you may be worried about your guests feeling cold and leaving the party early. This is a pretty good consideration to look at, particularly for the benefit of your guests, but you don’t have to move the party indoors. You could still use your back yard to enjoy an ambient, warm setting with your family and friends without restricting your outdoor fun to parties alone. Maybe you just love spending some time with them in the cool of the cold season, or even at night, when temperatures have dropped.

The Benefits of Outdoor Gas Heaters

Outdoor gas heaters use radiant heat to create a comfortable and welcoming atmosphere long after the outdoor fun is over. They come with a vast array of benefits that are able to offer you a warm welcoming place in your garden, or on your patio, that you can relax in. They also come in a variety of shapes, sizes or even styles to suit your individual heating requirements.  Below, we look at the benefits that outdoor gas heaters can have for your home.

They’re convenient
Whether you choose natural gas or liquid propane for your outdoor heating, you'll find that these appliances give you some degree of convenience. For the natural gas option, you can hook it up to your home's natural gas supply, so refueling doesn't become an issue. Simply turn it on, and let it warm your outdoor space.


They’re safe
Natural gas, when used in these heaters, won't harm the environment or pollute the atmosphere as the gas is contained within canisters. As a safety feature, natural gas is blended with an identifying odour to ensure that it is easily detectable in the event of a leakage. Essentially, when this source of fuel is used with an outdoor gas heater, you’ll get nothing less than instant heat, ambiance and peace of mind.

They’re quick
Outdoor gas heaters are one of the quickest ways to heat up a space. You don’t have to worry about shivering away whilst the element heats up, and you’re likely to be able to enjoy instant heat, meaning the party can go on for longer!


They’re customizable
Your patio can accommodate outdoor gas heaters, which are specifically meant for that purpose. With a vast array of designs available, you should expect a diverse range of features on these appliances. The market is currently geared towards heaters that are slim, stylish and minimalistic in all dimensions. The average Australian consumer is no longer interested in bottled gas, since this technique is not cost-effective where gas consumption is concerned. They want something that looks good, or that you can’t really see at all. Something that warms the space without making a show of itself is one of the most requested types of outdoor heating at the moment. In addition to this, Australian consumers want quality products, which have been manufactured by local companies, since local manufacturers are able to guarantee quality as per the country's standards.


Providers in Australia, such as Heatstrip, specialize in dealing with a range of innovative outdoor heating solutions. If you’re looking for gas outdoor heaters, you want to go for some that are high performance, low on the use of space and cost, and easy to set up and use. Choosing appliances that are low-glow electric radiant heaters, contributes to low outdoor heating costs at the end of the day. Everyone is looking at reducing heating bulls, especially where a lot of heating is involved for prolonged periods of time.

Unlike traditional heaters, modern heaters sold in Australia are stylish, minimalistic, high performance and result-oriented. So whether you are throwing a party, or simply relaxing in your own back yard, outdoor gas heaters will suit your purpose well.

05 January 2015

Apple Juice… Without a Juicer?


That’s right, if you’re getting a cold weather craving for some delicious apple juice but don’t yet have a dedicated juicer, you’re in luck. Making apple juice in your own kitchen is not nearly as intimidating as it may seem. With a few basic supplies and a bit of patience, it’s relatively easy to churn out fresh, homemade apple juice unrivaled by anything you get at the store.

Choosing Apples
The apples you pick for your juice have a tremendous effect on the finished product. In fact, if you choose your apples carefully, there will be little or no need for added sweeteners due to the high levels of natural sugar in the fruit. When making apple juice, a variety of red apples such as Red Delicious and Fuji should be used to create complex flavors. Bruised or otherwise imperfect fruits can also be used for juice making, as their full flavor is intact.

If possible, fresh apples should be obtained from a local farmers’ market instead of a supermarket or other store for maximum flavor and freshness. Each bushel of apples yields about sixteen quarts of apple juice, so keep this ratio in mind when determining the amount of apples you will need for your juice making project.

Be sure to get an appropriate number of glass mason jars to store your juice in.

Preparation
When you have decided on a suitable blend of apples for your juice, it’s time to start the process. Begin by thoroughly washing out the jars in hot, soapy water, then boil the jars for ten minutes to completely sanitize them. Keep the jars and lids submerged in the hot water until it’s time to use them to prevent them from breaking when you fill them with the heated apple juice.

Next, wash the apples in plain cold water and remove the cores with a corer or paring knife. Transfer the apples to a large, thick-bottomed pot filled with four inches of boiling water and put the lid on the pot to steam them. When the apples have softened, place them into a colander lined with layers of cheesecloth and allow the juice to drip into a large pot for an hour or until the apples are dry.

Juice Making
When the pot is full, add cinnamon to taste and bring the mixture to a low, simmering boil. Transfer the juice to quart-size canning jars, screw on the lid and tighten the ring around the jar. Place the jars in a water bath submerged in two inches of water for five minutes then remove them from the water with a pair of canning tongs, loosen the rings slightly, and leave them to cool slowly in a draft-free area overnight.

After the jars are cool, check them for a tight seal by pressing the center of the lid down. If it stays down, the jar is sealed and ready for storage. If the center makes a popping sound and pops back up, there is no seal and the jar should be placed in the refrigerator right away to prevent spoilage.

Homemade apple juice is both superior to store bought juice and simple to make in your own kitchen. This apple juice will stay fresh in the jar with no special attention for up to two years, so one batch will allow you to enjoy delicious apple juice all winter and beyond.