Renovating your kitchen is, indeed, an exciting thing to do. Nothing beats the thrill of finally seeing the finished output. However, as much as you want to fully use your newly renovated kitchen, you first need to go through a series of steps that comprise general cleaning.
Cleaning up a room that's full of construction debris can be tricky and challenging. It's undoubtedly not an easy task with all the dust, toxic fumes, and harmful objects that you have to go through.
If you're facing the same dilemma, you just got to the right place. This article will guide you on how to effectively clean up after a kitchen renovation project. Below, check out the five smart clean-up tips for a squeaky clean, new kitchen.
1. Rent A Bin For Debris Disposal
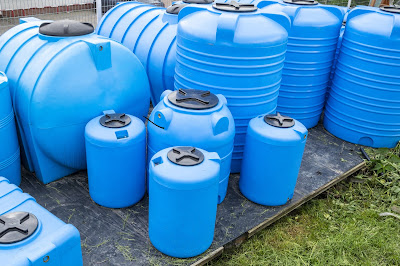
First things first, rent a bin so you'll have a container to put all your trash.
Before even rolling your sleeves and diving into the action of a general clean-up, one of the most important things you should do is rent a bin. Unfortunately, not all contractors are willing to care for the post-renovation mess. That's why you have to rent a crate due to the following reasons:
- Your regular trash container won’t be enough
Major renovations, such as a kitchen renovation project, will surely leave you with a mountain pile of trash and debris. However, they’ll never fit in your trash bin due to their size and amount.
- You have to abide by governing rules regarding trash disposal
Another critical thing to note are the rules and regulations given by your local government regarding proper trash and debris disposal. According to Same-Day Rubbish Removal, it's necessary to dispose of your garbage in the most eco-friendly way. Doing so ensures that you don't harm the environment.
Therefore, a primary thing to do is to rent a bin and secure a container to put all your trash.
2. Prepare Your Cleaning Tools And Protective Items
Secondly, you need to prepare the appropriate cleaning tools. Renovations like kitchen remodeling involve cement, paint, and other toxic chemicals that can be harmful to the body when inhaled. Therefore, it's best to have the right tools and appropriate protective items, such as:
- Face masks
- Hand gloves
- Goggles
- Soft towels and fabrics
- Used dryer sheets
- Gentle cleaning solution
- A vacuum + one or two extra filters
- A broom and a dustpan in case a vacuum isn't available
Preparing the above mentioned materials beforehand will help you do the cleaning faster and wiser.
3. Dispose Of Construction Debris And Trash
Now that you’ve prepared everything you need, it's time to dispose of all the debris and trash from the construction. These can be giant concrete piles, countertops, wood scraps, broken hardware, and other types of waste.
Make sure to wear your gloves, face mask, and goggles to keep you safe from unwanted dangers. Clearing off the area from these large pieces of debris will pave the way for the next steps to follow.
4. Clean Your Air Vents And Filters
One of the areas where dust has possibly accumulated is in your air vents and filters. Take note that this can be hazardous to your health and threaten your lungs. Therefore, make sure to thoroughly clean this so that you and your family won't be inhaling air that's full of chemicals and dust particles.
5. Make Use Of Your Vacuum
The next thing to do is make good use of your vacuum machine. Construction dust can be very fine and will surely get everywhere. Make sure to give adequate attention to every single corner of the room. Dust is usually hiding even in the darkest corners of your room, such as underneath your furniture and window frames.
It'd also help to constantly check your vacuum filter while in use. Dust can be overwhelmingly plenty that it could fill up your vacuum filter right away.
6. Wipe Down Every Single Thing
The last thing to do to secure a dust-free and spotlessly clean kitchen area is to wipe down every single thing. An old towel and a bucket of water with a gentle cleaner will usually do the trick. Ensure to wipe all corners, items, furniture, countertop, shelves, and the like.
After wiping comes floor mopping. Use a gentle floor cleaner appropriate for your floor material, and ensure that you've thoroughly mopped the space from wall to wall.
Conclusion
Renovation clean-up can be stressful, especially if you don't know where to start. The mountain-high amount of debris and dirt can surely overwhelm you. However, with the help of rental bins and your appropriate cleaning tools, effective cleaning is never impossible.
Considering these five easy steps for an effective clean-up will surely bring you closer to your newly renovated kitchen, which will be ready for use after a day or two.


