11 December 2017

5 Tips to setting up a coffee station in your kitchen


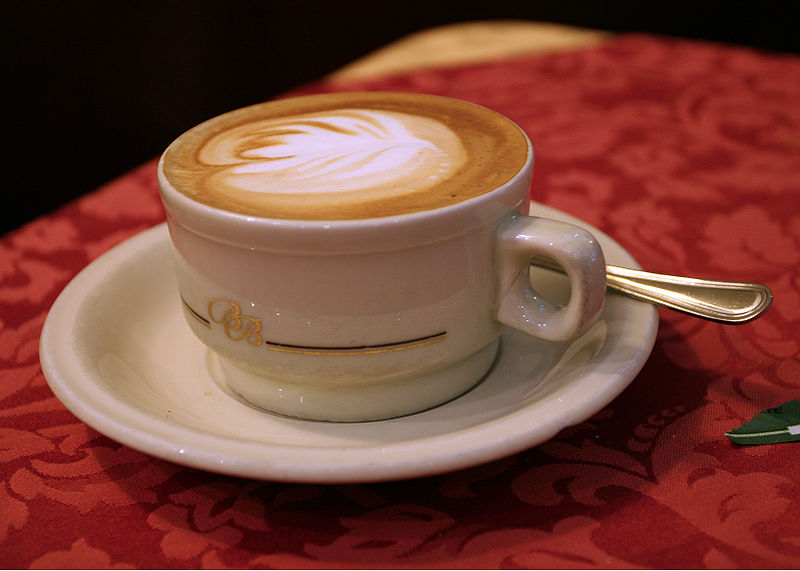
Coffee is one of the most refreshing drinks that one can pick. People love meeting over a cup of coffee as they discuss their personal matters or other business. How would you love to have a great coffee session at home with your family? This is possible if you can set up a coffee station in your kitchen so that you can be fixing cups of coffee in a short time. When you add a coffee station in your kitchen, you are simply setting up a mini coffee bar at your home! You will actually wonder how you have been going so long without it. To set up one of the best home coffee stations, you will need to find the best home espresso machine under 500 so that you can enjoy your coffee from the best coffee machines available.

Here are 5 tips that can help you to set up a suitable coffee station in your kitchen.

1. Find the best espresso machine

For you to make the best coffee at home, you will require a great machine for this role. This is where your coffee brewing prowess will emanate from. The perfect cup of coffee can be crafted with an espresso machine that is easy to use. As such, you need to find a machine that is affordable, easy to maintain and one that allows you to control each of the processes of making a great cup of coffee. You may want a machine that has luxury features such as cleaning systems that are automatic, cup warmers or even nifty LED lighting to make the coffee making process fun.

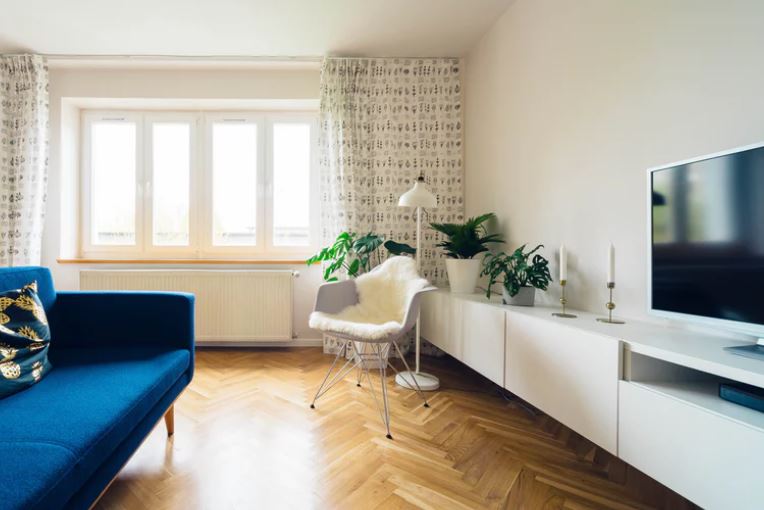
2. A special space for your coffee station

After you have bought the espresso machine, it is now time to find the most suitable spot in your kitchen to set up the coffee station. You can also use the essential coffee making accessories already in your kitchen for this role. Your kitchen counter, cabinet, side tables or carts would come in handy. If you want a better coffee station, you could still have this made for you. What really matters is that you have enough space and the right accessories to fix a quick cup of coffee when you need it.

3. Customize the coffee station

You can make your coffee station appear the way you want it. What you need is a convenient place where you can prepare coffee for your family and guests in the shortest time possible.  When you create a special cabinet to place all your coffee items, you are sure to have a well-organized kitchen and an exclusive coffee station that has all its accessories specially taken care of. It helps your kitchen to look less cluttered when you close the cabinet and secure the coffee station. To customize it, use a swing door or even opaque roller blinds. Have some kind of lighting fixed at the top of the nook to make it look appealing and special.

4. Additional items for your coffee station

To make your coffee station look more appealing and sort of professional, there are additional things that need to be included in it. You need sugar and coffee bowls. You can add some kind of unique artwork on your coffee station. Use a special vase of flowers and have a carrying tray and napkins so that you look chic as you serve your guests and family members.

5. Baskets and smaller containers to organize your coffee

Your coffee station can be organized by use of small baskets and small containers that are used to store the different types of coffee in your kitchen. You don't want a jumbled cabinet full of all sorts of coffee beans and coffee related stuff. Organize the various coffees in different containers and baskets so that you can access the right kind of coffee at the right time.

04 December 2017

The top 4 single serve coffee maker options in 2017

via

It is the holiday season and finding the perfect gift can be quite a challenge. If you are searching for the perfect gift for the coffee lover in your life, perhaps you should consider purchasing a single serve coffee maker. There are an abundance of coffee maker options on the market which can be a bit overwhelming if you don’t know what to look for. This article will highlight some of the top single serve coffee makers that are available in 2017. Homestratosphere is a great resource if you want to learn more about specific coffee makers as you can read reviews and learn about specific features.

  1. Full Tassimo T55. This machine works well, brews fast, and produces delicious coffee every time. Part of what makes this machine so great is that it does not require waiting time for the water to heat up. You will need to purchase T-discs to use with this coffee maker which may be problematic if you are a Starbucks drinker. 
  1. Nespresso VertuoLine. This coffee maker is one that provides class and style in its presence and brewing ability. This machine is quite large so it would fit best in a full size kitchen as opposed to a small apartment. If you are a coffee connoisseur, this machine is one to consider as it provides a great flavor and texture to your coffee after every brew. The downfall to this machine is that you have to purchase the coordinating Nespresso pods which can be a challenge to find. It is important to note that this machine brews small espresso-sized cups of coffee so if you want a normal sized cup of coffee, this machine may not be for you.
  1. Breville Gourmet. If you do not have the patience to wait for a cup of coffee to brew in the morning, this coffee maker is a great option for you as it brews very fast. Another great perk is that you can use K-cups in this system as well as reusable K-cup systems. Another great perk to this coffee maker is that it is very quiet. It is important to note that the water reservoir is not transparent so it can be a challenge to determine the amount of water that is available. Another important thing to note is that with this coffee maker, you will be shelling out a good deal of cash. It is not cheap however, you can count on having it for a long period of time as it is sturdy and durable.
  1. Keurig K10 Mini Plus Brewing System. Highlight as the best single serve coffee maker under $100, Keurig is well known for producing high quality machines and great tasting coffee. This machine is compact and can fit in small spaces. If you are looking to gift a coffee maker to someone who lives in an apartment or is a minimalist, this machine is a great one to consider. The cost is low which means that you could also throw in a box of your favorite K-cups. There are many to choose from whether you like tea, coffee, hot chocolate, or cappuccino, there is something out there for everyone.

24 November 2017

Top Features to Include When Creating a Backyard Oasis

If the idea of a backyard oasis appeals to you, then consider yourself part of the majority. Most homeowners love being able to enjoy their yard, get some fresh air, entertain in the outdoors, and just feel relaxed and at ease. A backyard oasis makes all of this possible, but let’s face it, it takes a fair amount of work to achieve. If you’re looking around your yard that looks rather bland, bare, and without personality and you’re trying to achieve that oasis feel, then here are some features you may want to include.

Royalty Free Photo

Water Feature

When you want to be able to get that oasis feel as quickly as possible, the best tip is to include some sort of water feature in your backyard. Water features are not only beautiful to look at, but the sounds they create are extremely relaxing and comforting. It can help to drown out neighbors, passing traffic, and just the everyday noise of life.

Popular water features include fountains, a small pond with fish in it, a fountain wall if you have the space, and even waterfalls built into a pond or fountain. Your water feature will depend on the space you have available, your budget, and just how big of an impact you want to create.

Garden Seating

In order for your backyard oasis to be enjoyed, you’re going to need to have inviting and comfortable seating. You can help to make it more comfortable by adding cushions and throws in relaxing hues and patterns.

Garden seating may be a small bench strategically placed next to the garden, or it could be a large dining table surrounded by chairs. It should be based on your needs and the space available.

Soft Lighting

As the experts at Architectural Landscape Design will tell you, part of creating that oasis atmosphere is adding special touches such as soft lighting. They can work with you to create a design that includes a variety of lighting options such as rope lighting, twinkle lighting, garden lights, pathway lights, and more.

Privacy Screens/Fencing

It’s rather difficult to create a backyard oasis if all of your neighbors are able to peer in and see you trying to relax. This is where privacy screens and fencing can come in very handy. Lattice work is probably the most common type of privacy screening as it still allows for airflow, and the sun to get through, but it gives you that sense of privacy.

Place the screening around any seating area you may have, as this is typically where you will spend the most amount of time. It’s also where you will entertain friends and family, so again that added privacy is nice to have.

The Oasis of Your Dreams

By using these tips, and seeking help from the experts, you’ll be able to create that oasis atmosphere that your backyard has been lacking. There’s a good chance that you will find you spend more time outdoors than indoors once your oasis is complete.

22 November 2017

7 Home Improvement Tips For Every Homeowner


Big projects or small, home improvement is a challenging, costly, and time-consuming task. Whether you are hiring someone to help you out or doing it yourself, there are many things that have to be considered. Here are seven tips for every homeowner who has caught the home improvement bug.

Begin with a realistic plan

Perhaps  you got excited after watching home improvement shows and suddenly want to change everything. Perhaps they made it look so simple on Youtube that you thought you can DIY anything. Whatever your inspiration for home improvement is, remember that making changes in the home can cost you a lot of time and money.

Always begin with a plan that is realistic to your budget and time. Sure, you can DIY a lot of things but do you have the time for it? You may want the same tiles featured in the magazines but is it within your budget?

Know what you want to do and what it costs to do it. Then, add a nice buffer of at least 15% of the expenses to make sure you don't bite off more than you can chew.

Add value to your home

Your home is your investment. When doing home improvement, make sure your changes and additions add value to your home.

Refinishing the hardwood floors to up the potential sale value or installing a signal booster such as a weBoost Home 4G to increase connectivity throughout the home are worthwhile expenses for the value that they add.

You can also develop your basement into another functional space. Be it an extra room or a home theater or even as something as simple as a basement toilet, renovating that area of the house will add value to your home. When planning changes and additions to your home, it is always good to consider whether it has a return on investment.

DIY

Do It Yourself home improvement projects can help you save a lot of money. However, you have to be aware of your own skills and limitations. Not every home improvement projects are suitable for DIY. If you are a beginner, don't tear the down walls right away. Start small and know when to ask for the help of a professional.

Work with the right contractor

Getting the right contractor is just as important as consulting with the right doctor. Get recommendations from supply houses, neighbors, friends, and online forums. Always ask for the licenses and permits that they need.

Check out the contractor's insurance and always contact references. There are so many home improvement contractor horror stories out there. Make sure that you work only with honest and reliable ones.

Consult an expert

Some home improvement projects just require expert help.  This is especially true for big projects. For example, if you are planning to remove a load bearing wall to have that Pinterest-worthy open space patio, call an expert before doing anything.

You have to accept that no matter how successful your last DIY project was or how many hours you spent watching how-to videos, some projects are not suitable to do yourself. Check out the developers in Toronto to get some ideas.

Make small changes

Home improvement need not involve embarking on big, expensive projects. Sometimes, doing something simple like changing up your curtains or installing an upgraded home security device can do the trick.

Personalize

Adding a personal touch to your home is the best way to improve its style and overall feel. Adding a mini-gallery of your family's photos on your living room wall or adding a new look to your personal library can make the home feel cozier.

14 November 2017

How to build a brick wall

via

Brick laying is a skill that you can easily learn provided you are a self-builder and keen to build (or fix) the brick wall in your home. In order to achieve best results, you need to lay quality bricks. You may want to hire an experienced tradesman for the quality results, that may be a cost effective option too. While building a wall or repointing brick, the mortar you use should be of good quality because it helps in maintaining the wall over the years.

As mentioned in the beginning, if you want to get involved in the bricklaying project yourself, you need to practice this skill and the best way to practice is to start with building a wall in your garden. Although it seems easy, but the most experienced DIY will need to practice it first. before you get start with the project consider following requirements. Consider the type of the brick, standard size is recommended, you can consult this chart to get the right type of brick.

1. Layout the Bricks:
When you have prepared the grounds, and necessary foundation is prepared, lay out the bricks at both ends of the wall. With the help of the string line, make a straight line at brick height between the two outside bricks.

2. Mix Sand and Cement:
Accumulate five shovels of sand and one of cement on a board or any surface. With the help of shovel, mix it to make it a consistent color. make the mixture hollow from the center, pour water and mix it well. repeat until it turns into a smooth creamy texture or paste, but not runny mixture.

3. Lay Mortar:
Along the string line, lay 1 to 2 cm mortar bed. Lay first brick, while starting at one end, and tap over it to settle it on the mortar. Apply the mortar paste at one end of the next brick, and place it next to the first brick and attach both of the bricks. Repeat the procedure along with the string line to keep it straight.

4. Place the brick side-on where the pillar starts:
Determine where you want the pillars to start. At that point, place the bricks side-on and to the end of the wall. As you build up the wall, each consecutive course of bricks should be laid in the opposite direction.

5. Lay half-bricks: 
During the process, at certain points, you will need to place half-bricks. In order to split the bricks, place the bricks on its side, place bolster on the split point and strike the head firmly with the hammer and split cleanly at the first stroke.

6. Build one course higher:
It is important to remember that you build at least one course higher on the pillars. As you build the wall, move the string line up. Each brick must be placed over the center of the beneath one.

7. Mortar Joints:
The mortar layer as joints between the bricks, should be thick. Vertical mortar joints should be10mm thick; with the standard size make sure it is 75mm thick.

8. Attractive Soldier Course for wall:
To make the walls attractive, adding a solder course on the top of the wall is a great idea. To achieve that course, place the bricks vertically lengthways. A second higher string line will be required for the uniform look.

9. Finish the beds:
In order to remove the excess mortar in beds, scrape the mortar into joints with the rounded edge of the brick jointer. Remember, start finishing with the horizontal lines and follow with the vertical ones.