Showing posts with label smart stuff. Show all posts

16 December 2016

This is the best knife sharpener I own


Anybody who knows me or who's spent any time around this website will tell you that I am a passionate cook. An early lesson I learned was the importance of using the proper equipment for the job at hand especially when it comes to knives.

Tools, including kitchen knives look and function the way they do for a reason. A paring knife is for peeling and dicing. A chef's knife is for carving. A santoku is for chopping. Well, you get the gist.

None of those knives can do their job if they're dull. Not only can they not do their jobs, dull knives pose a real danger to someone using it. A dull knife makes someone work harder and to hold that knife in a way it wasn't designed to be held. That's how you get cut.

I've been an obsessive knife sharpener for almost as long as I've been cooking and I've tried just about every type there is. I got my first carbide knife sharpener around five years ago and it was a real game changer.

Well there's a new use for carbide sharpening tech and it's available now in the form of the AnySharp.


The AnySharp takes the excellent performance of carbide sharpening and adds a strong suction cup to the base. So now for the the first time, knife sharpening is a one-handed operation.

My knives have never been sharper with less hassle and in a bonus to end all bonuses, the AnySharp sharpens my serrated knives too.


Honestly, these things are affordable, sturdy and a perfect gift for any cook in your life.

17 March 2015

Practical yet stylish bathroom design ideas

Image by Ines Hegedus Garcia, Used under a Creative Commons license.

Deciding to renovate or redecorate the bathroom is considered by many to be a difficult and demanding task. Some people believe it takes a lot of exertion and a large upheaval to make any real difference to the room’s look and feel.

However, there are quite a few practical yet stylish changes you can make, which have the potential to transform any bathroom. Best of all, they don’t require much time, effort or money either.

Put up some shelving

This might seem like a straightforward step, but it is surprising just how many people don’t put up shelves in their bathroom. In addition to improving organisation, shelving units can be incredibly decorative too. Floating shelves look clean and crisp, but ornate options will suit more traditional bathrooms.

Introduce more storage

Certain bathroom items can be rather unsightly and not very attractive, which would be better hidden away. This is a great opportunity to enhance the room’s aesthetic, so think about introducing storage containers such as glass jars for cotton swabs or wicker baskets for toilet rolls.

Change the cabinet

If you don’t have the budget to update your entire suite, consider changing the cabinet instead. This piece of bathroom furniture has the potential to revamp and rejuvenate any tired looking space but isn’t that difficult to fix-up. What’s more, it will increase practicality and improve overall tidiness.

Upgrade the small details

It is easy to overlook things like towel racks, toilet roll holders and sink taps, but if you upgrade these small details, you’ll end up with a much more decorative bathroom. Even if you don’t have these furnishings in the first place, it will undoubtedly increase overall functionality anyway.

Improve the sights and smells

There is nothing quite like taking a nice relaxing bath after a stressful day. But this can be improved even more by adding some scented candles, which smell great, create the right ambience and reduce your energy footprint too.

Put up more mirrors

This is a really good idea if you have a small bathroom, as mirrors can make a confined space look much larger. On top of that, adorning and alluring mirrors are bound to enhance your bathroom’s appeal while providing greater functionality at the same time.

All of these design ideas are sure to be within most budgets and don’t require much work or effort to complete. But most importantly, they’ll improve the style and practicality of your bathroom and day to day living.


09 March 2015

Stop energy leaks cold

Did you know that half of all people in the US spend 20% of their income on energy costs? That's a huge amount of money and by insulating properly you can decrease the amount of money you spend and get yourself on the right side of those statistics.

 
Via: Spray Foam Insulation Kit Manufacturer

02 March 2015

Gettng the right sized heater for your patio space

via

The outdoor living areas within your patio and garden provide you with the best moments of solitude and relaxation due to the natural openness and closeness to nature. However, at some points in the year, it gets too cold for you to enjoy the serenity of these places. During this time, you need a way to make your patio as cozy as possible so that you can still get out there and enjoy it. The solution in this case is a patio heater. While buying this device, you have to make certain considerations in terms of the space available as heaters come in a wide range of sizes with different specifications. If you’re looking for the right sized heater for your patio space, then look no further. We’ve put together some information on sizes of heaters for different fuel sources so you will find the decision much easier to make and you’ll be able to get the perfect heater for your outdoor space.

Gas patio heaters
Gas heaters use propane as fuel most of the times. They are popular because of their ability to heat up a place very quickly. Since these appliances use gas and need to have a gas tank, they tend to be very big, and come equipped with propane gas tanks that can hold as much as 20 gallons of gas. These types of patio heaters come in handy when you intend to heat a large area. However, they are unsuitable if you have space limitations. For them to work uniformly, you need to place them right in the middle of the area you intend to heat which can prove problematic in smaller spaces. Over time, space issues have led to manufactures designing smaller, tabletop patio heater versions that are a bit more practical in terms of size but still they usually don’t look quite as discreet as their electric counterparts. You can place them on the patio table or mount them on the walls of the room, or even the ceiling. However, many homeowners feel these options place the focus on the heater, rather than having it blend in with their patio.

Electric heaters
There are a wide variety of different electric heaters that come in a variety of different sizes. One standout feature is the fact that they do not need any fuel as such, as they are powered by electricity. This means that you do not have to worry about a huge gas tank clamouring for space with other items in your patio. In most cases, electric heaters are mounted on the wall and plugged to a power supply. You can always direct the heat where you want it most when using these appliances. In addition to this, you can control temperature levels depending on the amount of heat you require. Electric heaters include the classic type, convective panel heaters and under desk heaters. The Thermofilm range of heaters are innovatively designed to fit smartly with any patio or garden space, and you won’t find space an issue. Worth a look if you’re a little short of space.

An electric heater is far more space considerate than its gas counterpart. However, some gas heaters are more energy efficient. What you need to look for, particularly if you either have a small space or do not want your heating to be an eyesore is a company who specialise in offering bespoke heating solutions to a variety of different spaces. Getting the right heating will certainly help to ensure you can enjoy your patio or garden space without having to step over cables or look at ugly heating elements.

13 February 2015

Is it safe to be in a property while it is being treated for pests?

via

Pesticides can be dangerous if you use them the wrong way, so it’s often necessary to call in the experts if you have a problem with pests in your home, or of you want to prevent a problem from occurring.

Pest control experts know what they are doing, and they know what extermination processes and methods to use for different situations. As long as you take the necessary actions before, during and after the treatment process, you and your family will be perfectly safe.

What should you do before your home is treated for pests?

The most important thing is to make sure that the professional you hire is licensed. This means that they will be able to complete a safe and effective job, and will be able to advise you correctly on precautions to take. States have their own individual licensing procedures, with the Environmental Protection Agency, providing training in the handling of certain pesticides. Once you have made an appointment it’s important to make sure that the area to be treated is ready for when the pest control experts arrive.

If you are having a routine treatment completed then, most of the time, this is concentrated on the exterior of your home to prevent pests from getting inside the premises. Interior pest control is usually used when pests have actually been encountered indoors. If the exterior of your home is being treated then you need to make sure that the area is cleared, that grass is cut if necessary and that children and pets are removed from the area.

Similarly, if the interior of your home is being treated, you need to clear any small items from the floor and put away any food items; you should also cover any fish tanks and either cover or switch off the pump. When the Long Island pest control experts arrive you will often need to vacate your home, depending on what pests are being dealt with.  Children should always be out of the premises while the work is being undertaken, and it’s a good idea to make sure pets are too.

What happens during the treatment?

When your home is being treated for pests low levels of pesticide are used which are lethal to pests while not threatening the health of you or your pets, once they are dry. There are different treatments available depending on the pest involved. For instance, aerosols and dusts can be used for applying to cracks. This means that the pests can be killed, but there is no harmful reside.

When a pesticide has to be applied to a surface that’s exposed the experts follow very specific procedures to ensure that the right quantities are used in the correct manner. Application of these pesticides also dictates that all animals and humans must stay away from the surfaces until they are dry.

What happens after the treatment?

Recommendations vary as to the length of time you should stay out of a home that has been treated, except to say that you should not touch any treated surfaces until they are dry. You should ask the experts undertaking the job whether it is necessary to stay out of your home, as this can depend on the type of treatment undertaken.

If you have any concerns about re-entering your home then a period of 2-3 hours is definitely sufficient for any treated areas to have dried out. After this time you can enter your home with complete ease of mind, and no pests to worry about.

09 February 2015

The benefits of outdoor gas heaters


Do you want to throw an outdoor party during the winter season? Whether it’s for a birthday, or special event, you may be worried about your guests feeling cold and leaving the party early. This is a pretty good consideration to look at, particularly for the benefit of your guests, but you don’t have to move the party indoors. You could still use your back yard to enjoy an ambient, warm setting with your family and friends without restricting your outdoor fun to parties alone. Maybe you just love spending some time with them in the cool of the cold season, or even at night, when temperatures have dropped.

The Benefits of Outdoor Gas Heaters

Outdoor gas heaters use radiant heat to create a comfortable and welcoming atmosphere long after the outdoor fun is over. They come with a vast array of benefits that are able to offer you a warm welcoming place in your garden, or on your patio, that you can relax in. They also come in a variety of shapes, sizes or even styles to suit your individual heating requirements.  Below, we look at the benefits that outdoor gas heaters can have for your home.

They’re convenient
Whether you choose natural gas or liquid propane for your outdoor heating, you'll find that these appliances give you some degree of convenience. For the natural gas option, you can hook it up to your home's natural gas supply, so refueling doesn't become an issue. Simply turn it on, and let it warm your outdoor space.


They’re safe
Natural gas, when used in these heaters, won't harm the environment or pollute the atmosphere as the gas is contained within canisters. As a safety feature, natural gas is blended with an identifying odour to ensure that it is easily detectable in the event of a leakage. Essentially, when this source of fuel is used with an outdoor gas heater, you’ll get nothing less than instant heat, ambiance and peace of mind.

They’re quick
Outdoor gas heaters are one of the quickest ways to heat up a space. You don’t have to worry about shivering away whilst the element heats up, and you’re likely to be able to enjoy instant heat, meaning the party can go on for longer!


They’re customizable
Your patio can accommodate outdoor gas heaters, which are specifically meant for that purpose. With a vast array of designs available, you should expect a diverse range of features on these appliances. The market is currently geared towards heaters that are slim, stylish and minimalistic in all dimensions. The average Australian consumer is no longer interested in bottled gas, since this technique is not cost-effective where gas consumption is concerned. They want something that looks good, or that you can’t really see at all. Something that warms the space without making a show of itself is one of the most requested types of outdoor heating at the moment. In addition to this, Australian consumers want quality products, which have been manufactured by local companies, since local manufacturers are able to guarantee quality as per the country's standards.


Providers in Australia, such as Heatstrip, specialize in dealing with a range of innovative outdoor heating solutions. If you’re looking for gas outdoor heaters, you want to go for some that are high performance, low on the use of space and cost, and easy to set up and use. Choosing appliances that are low-glow electric radiant heaters, contributes to low outdoor heating costs at the end of the day. Everyone is looking at reducing heating bulls, especially where a lot of heating is involved for prolonged periods of time.

Unlike traditional heaters, modern heaters sold in Australia are stylish, minimalistic, high performance and result-oriented. So whether you are throwing a party, or simply relaxing in your own back yard, outdoor gas heaters will suit your purpose well.

05 January 2015

Apple Juice… Without a Juicer?


That’s right, if you’re getting a cold weather craving for some delicious apple juice but don’t yet have a dedicated juicer, you’re in luck. Making apple juice in your own kitchen is not nearly as intimidating as it may seem. With a few basic supplies and a bit of patience, it’s relatively easy to churn out fresh, homemade apple juice unrivaled by anything you get at the store.

Choosing Apples
The apples you pick for your juice have a tremendous effect on the finished product. In fact, if you choose your apples carefully, there will be little or no need for added sweeteners due to the high levels of natural sugar in the fruit. When making apple juice, a variety of red apples such as Red Delicious and Fuji should be used to create complex flavors. Bruised or otherwise imperfect fruits can also be used for juice making, as their full flavor is intact.

If possible, fresh apples should be obtained from a local farmers’ market instead of a supermarket or other store for maximum flavor and freshness. Each bushel of apples yields about sixteen quarts of apple juice, so keep this ratio in mind when determining the amount of apples you will need for your juice making project.

Be sure to get an appropriate number of glass mason jars to store your juice in.

Preparation
When you have decided on a suitable blend of apples for your juice, it’s time to start the process. Begin by thoroughly washing out the jars in hot, soapy water, then boil the jars for ten minutes to completely sanitize them. Keep the jars and lids submerged in the hot water until it’s time to use them to prevent them from breaking when you fill them with the heated apple juice.

Next, wash the apples in plain cold water and remove the cores with a corer or paring knife. Transfer the apples to a large, thick-bottomed pot filled with four inches of boiling water and put the lid on the pot to steam them. When the apples have softened, place them into a colander lined with layers of cheesecloth and allow the juice to drip into a large pot for an hour or until the apples are dry.

Juice Making
When the pot is full, add cinnamon to taste and bring the mixture to a low, simmering boil. Transfer the juice to quart-size canning jars, screw on the lid and tighten the ring around the jar. Place the jars in a water bath submerged in two inches of water for five minutes then remove them from the water with a pair of canning tongs, loosen the rings slightly, and leave them to cool slowly in a draft-free area overnight.

After the jars are cool, check them for a tight seal by pressing the center of the lid down. If it stays down, the jar is sealed and ready for storage. If the center makes a popping sound and pops back up, there is no seal and the jar should be placed in the refrigerator right away to prevent spoilage.

Homemade apple juice is both superior to store bought juice and simple to make in your own kitchen. This apple juice will stay fresh in the jar with no special attention for up to two years, so one batch will allow you to enjoy delicious apple juice all winter and beyond.

09 December 2014

How much should you spend on a blender to use in your kitchen?


A blender is one of those kitchen utensils that can vary greatly in price, from the tens of dollars to the mid hundreds. There’s no easy answer as to how much you should pay for a blender, a good deal of the decision is going to depend on what you want to use it for. Of course your budget will also need to come into the equation.

If you’re a nutrition fanatic, and the blender is going to be put to work to make everything from soup to purées and from nut butter to baby food, then may want to invest in a powerful machine that’s going to withstand the workload. On the other hand if you’re just a smoothie a day person you probably don’t need to break the bank.

What’s the difference between the different priced blenders?

The blenders at the top end of the market are expensive, there’s no two ways about it, but they do have impressive blending strength. They have a real work horse of an engine and precision engineering that makes sure whatever you are blending is literally pummeled away. They are sturdy and strong and they will endure a large amount of wear and tear. Not to mention, they are the nutrition aids that are popular to be seen with. If you’re interested in keeping up with the neighbors, these are the blenders that you aspire to.

Now, if you have the budget, you may want to have one of these mean machines no matter what, but do you really need it? There are plenty of blenders on the market in a lower price range that will do a job for normal day to day blending.

The mid-price range blenders, at around $100, will happily withstand your normal soup and smoothie demands without surrendering under the pressure, and it has to be said that even those blenders in the lower price range are worth considering if you’re not a major foodie. Let’s face it, if your blender is only going to see the light of day a couple of times a week, and you’re happy with a relatively smooth smoothie, you may be quite happy with a lower end blender that does a basic job.

Are there any other options?

If you don’t want to invest in a standing blender then you may want to consider an immersion or “stick” blender. If you have an immersion blender then you literally just have the stick; the motor is situated in the handle. This may be a good option for you if you are limited to the amount of storage space you have, and you only blend small amounts. For larger jobs, such as blending a whole kale, you really need to use a standing blender.

If you love your smoothies and soups then a blender is a great addition to your kitchen. If that’s as far as your culinary blending exploits are likely to progress then you don’t need to spend a huge amount on a blender. If you want to blend away for hours, with a high rate of blending power, then it may be worth taking the plunge and making that big investment.

28 November 2014

Drips, leaks and squirts: simple fixes for your kitchen faucet

Via
When you turn your faucet off and it doesn't turn off panic usually sets it. After you’re done getting angry, you usually need to head to the hardware store to try to fix the problem. But, what should you purchase? A lot of DIY solutions just aren't right, and they can actually leave you worse off than when you started. Here are some solutions to swear by, not at.

Determine Where the Leak Is Coming From

This is probably the most important step. If you don’t know where the leak is coming from, you can’t fix it - period. So, try to determine if it’s leaking just from the faucet itself or if the water is also coming out of the handle. If it’s leaking from the faucet, you may need to replace a seal here, or you might need to replace the whole faucet, depending on what’s damaged and how badly.

If the leak is coming from the handle, it may be a simple O-ring.

Shut the Water Off

Shut the water off before you start working or you’ll have a gigantic mess on your hands. The shut-off valve for most kitchen sinks is usually underneath the sink. It’s a small handle that you can turn to shut the water off. Sometimes, it’s a lever. 

Verify that the water is off before proceeding.

Pry off Your Faucet Handle

If you have a single-handled cartridge faucet, pry the small plastic cap off the top of the handle. If you have a duel-handle faucet, you’ll need to take the decorative cap off both the hot and cold water handles. If you have a handle-style faucet, instead of a twist knob, you can usually unscrew the end of the handle and then unscrew the fixture.

The cartridge lies underneath the decorative cap or handle. There’s also a cartridge in here that mixes the hot and cold water if the cartridge is worn out or cracked, it’s entirely possible that water could be seeping through here to the spout.

Fortunately, this piece usually pops out so that you can replace it. If it doesn't you may need to replace the entire faucet unit.

Unscrew the bonnet with a pair of slip-joint pliers and then use needle-nosed pliers to grab the U-shaped retainer clip. Set this aside, but remember its orientation. Inspect the o-ring while you’re at it. Once the bonnet is removed, more of the faucet can be taken apart on most models.

If the rubber o-ring is damaged, replace it.

Replace the Parts and Put Everything Back Together

Most parts on your faucet can be purchased at a hardware store, but if you want decorative parts, now is the time to replace them. Stores and websites, like BedBathandBeyond.com, carry a lot of really attractive models that aren't very expensive but look amazing.

Reassembly of the faucet is the exact reverse of removal. Make sure that that the bonnet is reoriented in the correct way before securing the handle. Otherwise, you’ll have another leak on your hands.

Michael Perry has had his share of leaking faucets. A father of five busy children, he's always fixing something or writing about fixing something. Look for his informative articles on a variety of websites and blogs.

03 November 2014

Forget everything you think you know about drop ceilings

When I was doing a lot more retail design than I do these days I loved to work on older homes. There was always something about having to work within the confines of an existing structure that made me think more creatively. Blank slates are easy, but resolving a problem in an older home requires real effort. It's important to honor the structure you're working with and the challenge is always to add function without introducing any extraneous elements. Not breaking the bank is usually in order too.

My older home clients used to reach out to me initially because something had happened that they just couldn't live with.

In a plaster and lath home, it was usually the aging plaster itself or water added to aging plaster that prompted the decision to do something.


However, a water problem like in the office photo above can easily turn into a budget buster. Fixing the underlying problem is step one obviously, but repairing the original ceiling and walls is where the meter really starts running.

For all practical matters, nobody builds plaster and lath ceilings and walls anymore. and it's very difficult to partially rebuild a damaged old wall using drywall. Typically, all of the plaster comes out and gets replaced with drywall. By the time you're at that point, you're over budget and still have a room to finish.

Oh the joy of owning an old home.

There are options you know and they're not the drop ceilings you remember from school and work.

Honestly, if I were in the position where the damaged office shown above were mine, I'd be very inclined to replace all of that damage with something like this.


Yes, that's an Armstrong drop ceiling. It's the Easy Elegance Coffer and you can read about it here. 

Of course you'd repair the damage in the original room but when you're up against a wall (no pun intended) when it comes to a budget, a solution like a new drop ceiling from Armstrong may be the your best option. I know that's what I'd do.

In the meantime, take a look at Armstrong's inspiration gallery. You'll be amazed at the planks, the panels, the drops and the metals they have available. I know I was!

01 November 2014

Butcher block surfaces from ButcherBlockCo.com

When I was a kid, we used to buy our meat from a butcher. As in a real, live butcher who worked in an actual butcher shop. This was not by any means a charcuterie and concepts like grass fed and free range weren't even imagined yet. What it was an honest-to-goodness butcher shop and I remember it smelling like a combination of blood and the heavy paper everything came wrapped in.

I was fascinated by the place and what fascinated me most was the table-sized butcher block where just about everything was cut. It looked a lot like this one.

Buy this table here!

Those days are gone of course --killed off by a combination of changing consumer tastes and proliferation of grocery stores.

Though the traditional butcher shop may be well on its way to extinction,  those butcher block tables are still made by the John Boos Company and here's one they call the AB.


Here's the AA


I took those images from the ButcherBlockCo.com's website. ButcherBlockCo.com is a small firm in Phoenix that specializes in butcher block tables and counters from the John Boos Company. John Boos has been making wood tops and counters since 1887 and they are the gold standard of what a butcher block surface ought to be.

I've always known the reputation of John Boos but until recently, ButcherBlockCo.com was unknown to me. That changed with the arrival of this.


That is a scale replica of a John Boos AA and in my photo it's being used as intended. Namely, as a cheeseboard. My Mini Boos Butcher Block came with a rosewood handled cheese hatchet by Boska. Needless to say, I love this thing. It works as advertised, people can't look at it and not comment and it reminds me of that butcher shop a long time ago. That's what we call a win.

But ButcherBlockCo.com is more than just a purveyor of novelty cheese boards. They sell, direct to consumers, the full range of John Boos products and they do something else I've never seen offered on a website before. You can price and order your own John Boos butcher block counters. Seriously, there's a calculator built into the website. Not only that, they offer free shipping on any order over $75.

So if you're in the market for butcher block counters, tables, islands, cutting boards, kitchen carts, work tables or anything else the John Boos Company makes, look no further. ButcherBlockCo.com has you covered. Check out their website, find them on Facebook and follow them on Twitter too.

08 October 2014

Seven must-haves for a new home


Building a new home can be both exciting and stressful, especially when it comes to choosing the house plans and envisaging your life in the abode once it has been built. Many people get swept away in the thrill of finalizing their plans, but perhaps don’t take as long considering the layout and inclusions as they should. In order to minimize any post-construction regrets, it’s important that you factor in as many relevant details as you can before the building work starts.

From weighing up the amount of storage space and natural lighting, to considering electrical outlets and the placement of rooms, there is much to sort out. To help bring you many years of blissful home life, read on for seven elements you’ll want your house design to factor in.

Low-Maintenance Fixtures, Fittings and Surfaces

When designing a house that you’re planning on living in for many years to come, it’s always a good idea to keep the choice of fixtures, fittings, and surfaces in mind. For example, low-maintenance materials such as granite, quartz and laminate can be ideal for kitchen and bathroom bench-tops. Similarly, polished concrete floors can be easy to look after over the years, while stainless steel fixtures and fittings are a breeze to polish up as time goes by.

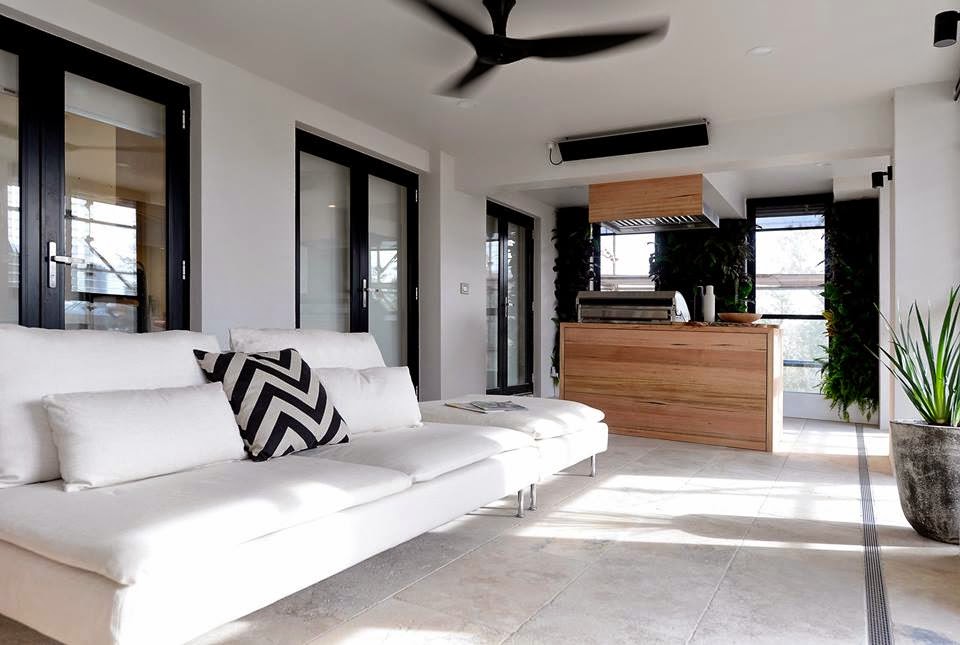
Placement of Rooms or Flexible Floor Plans

It’s always a good idea to think carefully about the placement of rooms in your home’s layout. For example, do you need a small powder room near the garage or back door to allow for clean ups after working on cars or in the garden? Or perhaps you need to ensure that the kitchen is placed close to the garage so that there’s no issue of lugging groceries too far? It’s also wise to choose flexible floor plans and make sure your house plans fit your needs. Having rooms or spaces in the home that can adapt easily to the changing needs of the family over time is very helpful.

Storage Space

In this day and age pretty much every family has accumulated a lot of stuff. Whether it’s a large collection of clothes, sporting equipment, books, DVDs or gadgets, most people never quite factor in enough storage space for all their belongings when designing a house. In the planning stages, make sure you include ample storage that will suit your needs both today and in the future if your family is likely to expand.

Look for areas of wasted space where you can create a small utility closet or storage nook (such as under flights of stairs, between bedrooms, or even in vaulted ceilings). Look to add in as much accessible storage space as possible, such as cabinets and shelving at heights that can be reached without ladders.

Provisions for Pets or Elderly Family Members

If you’re customizing your home to suit your family, make sure you think about the elderly members, as well as the four-legged ones.


If you currently have, or will in the future, less mobile family members living with you, have a very good think about sticking to a single-level home that doesn’t have any stairs.

Similarly, more and more people are factoring their pets in when designing a home these days. Homeowners can look at installing a dog-bathing facility in the laundry, or specially-designed cabinets for pet food in the kitchen or garage.
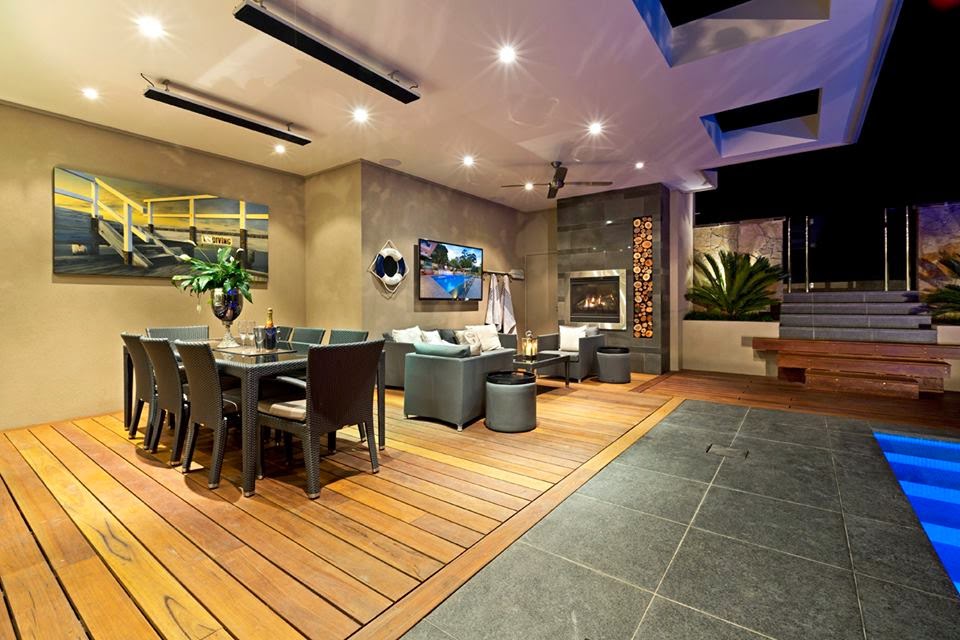
Heating and Cooling

Installing the right kind of heating and cooling systems during the build of a home is always going to be much cheaper than adding them in after, so don’t forget to consider your family’s needs in this area.

For starters, make sure your new home has properly-insulated walls to help keep the abode cool in summer and warm in winter, without a lot of extra need for power-draining appliances. As well, carefully consider whether you’re likely to want or need underfloor heating in the future, as it is one of the most expensive items to retrofit later on.

Electrical Outlets

Another thing that many people forget to include enough of in their home design is electrical outlets. As early as you can, think about each room inside your house, as well as the outside spaces, and consider exactly how many power outlets you might need, as well as where best to locate them.


Consider adding plugs on the kitchen island for phone chargers, under windows for Christmas tree lights, and in the bathroom and laundry for appliances such as hairdryers, shavers and dust busters.

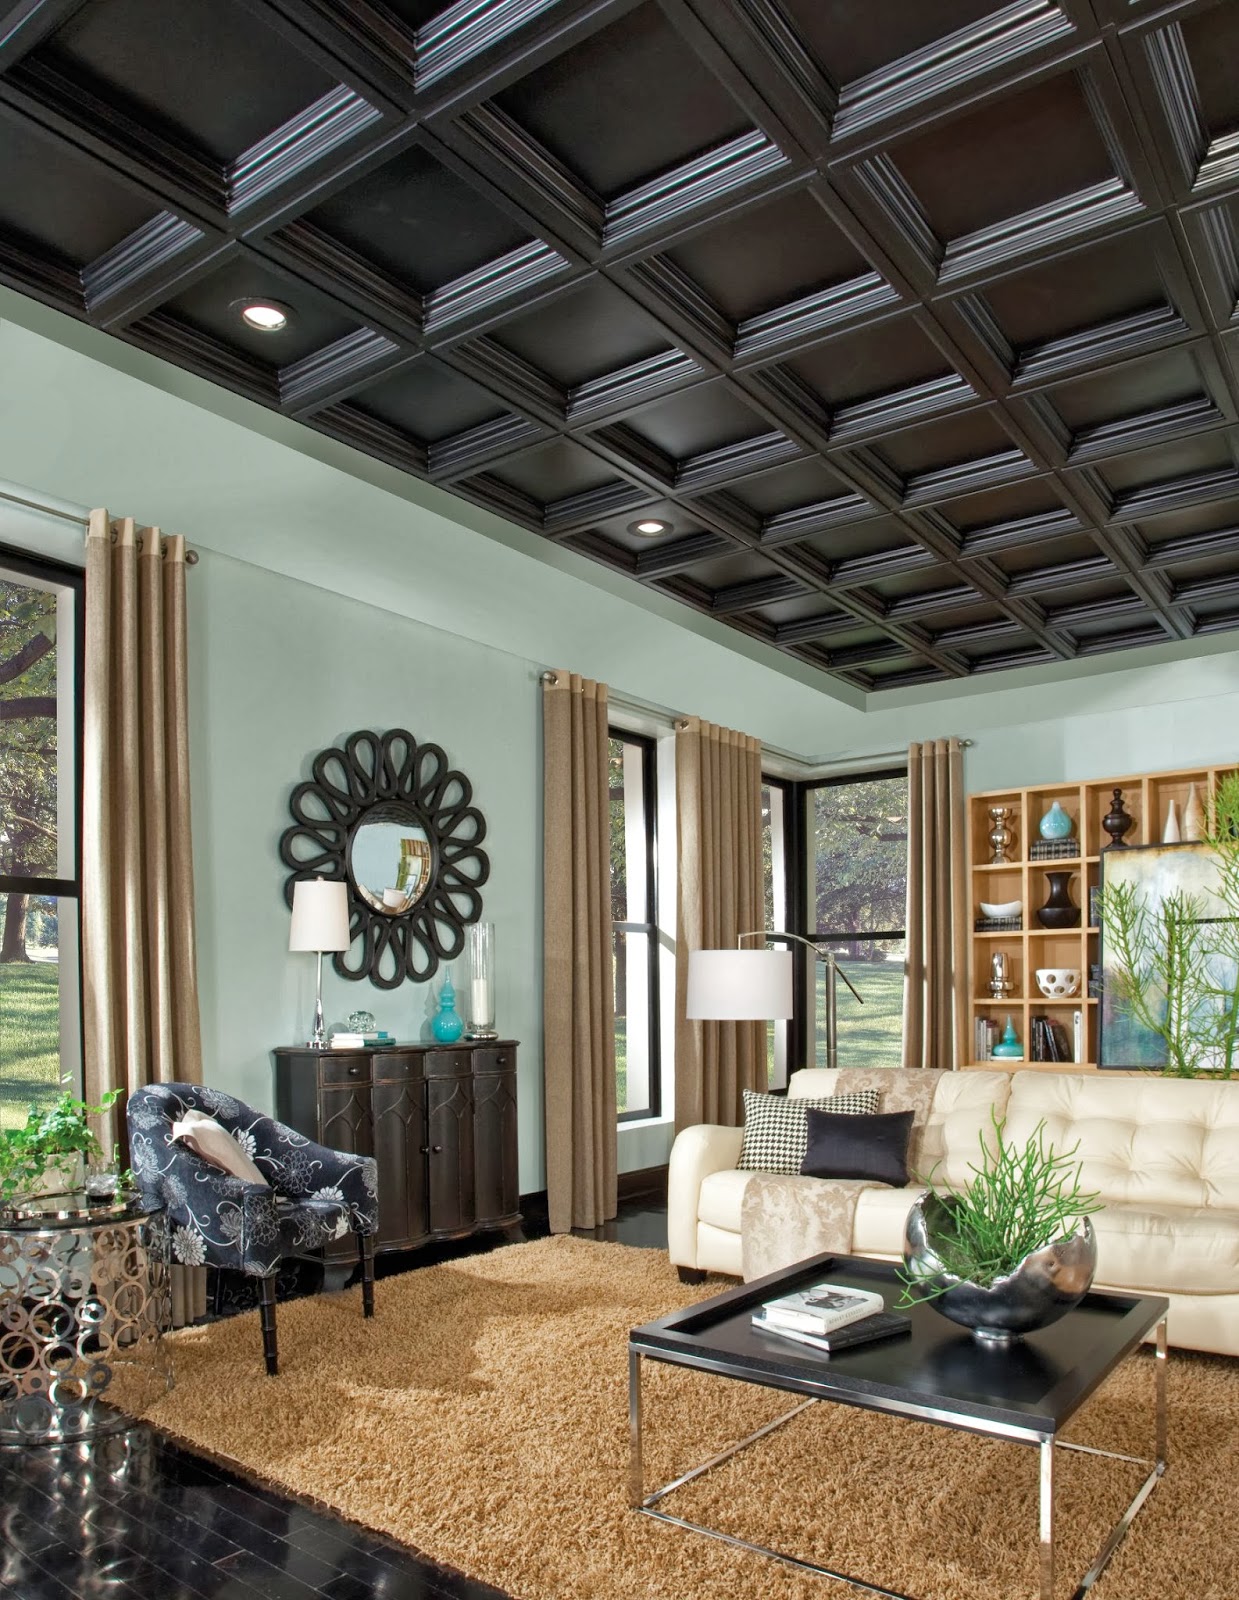
Number of Windows and Skylights

Again, many people forget to factor in enough windows or skylights when designing their home. Natural light is one of the most sought-after elements in a house, so carefully consider the aspect and layout of each room in your plans to make sure you don’t end up with a residence that feels dank and dark, no matter the time of year.

29 September 2014

The Bridal Registry Guide: Things to consider when building your wedding registry

via

If you are finally getting ready to say goodbye to your single life and plan a fantastic wedding, chances are that you have a million things on your mind. Indulging your oddest whims in different department stores by spending a lot of money that you don’t really have is probably the last priority on your to-do list right now.

But what if the items that you are craving for at the moment could actually come from your closest friends and family members who want to help you build a new life with your better half? From this standpoint, creating a wedding registry is a smart move.

Following a well-organized, manageable Goodearth Bridal Registry will allow your wedding guests to select the most inspired must-haves and surprise you with the perfect gift. On top of that, a registry will enable you to determine who bought what (in case the card vanishes into thin air) and enjoy your first days as a married person without being forced to deal with returns or duplicate present issues. Wondering how you could prevent tiny mishaps that could compromise your wedding registry creation and management efforts? If so, here are a few things that you should consider.

Start Early. Early planning has its benefits. Just think about it: some of your closest friends and family members will want to surprise you with the coolest, most practical and sleek gifts as soon as you announce your engagement. This is precisely why it may be a good idea to create your wedding register early (preferably a couple of weeks before your engagement party) and list a few essential items that you want to get your hands on. It’s never too early to start, especially since you can add your favorite picks, like those gorgeous dinner sets for instance, which is more or less a pretty essential part of any lavish wedding and edit your register later on.

Register at Multiple Locations. Why limit your options when you can register at multiple stores? According to Real Simple, it would be best to stick to two or three department stores, taking into consideration that handling multiple bridal registries can be stressful and time-consuming.

Focus on Everyday Items That You’ll Actually Need. These days, you can register for everything your heart desires: from socks to stocks. Some financial institutions even open bank accounts enabling guests to deposit money for grooms who are saving up for a place of their own. Other couples choose to redirect their guests’ contributions to their non-profit of choice. If you are expecting less conventional presents, remember that some of your guests may want to offer you traditional gifts, like a colorful, custom made dinnerware or luxurious bedding for instance; this is why you should also register at a large chain store to expand your options and keep all your categories of guests happy. At the end of the day, you can satisfy your philanthropic needs. If you want to receive everyday items from your guests, it is advisable to focus on elements with a prominent practical value. Always put usability above looks and ephemeral trends. For instance, expensive china with an elegant design is definitely more useful than a wine fridge, especially if you only drink beer. Analyze your real necessities and expectations before editing your wedding registry.

Let Your Guests Know Where You Have Decided to Register. If you want to comply with the complex and at times hard to decipher wedding etiquette, you shouldn't use your wedding invitations to let your guests know where you have chosen to register. Even so, most stores distribute information cards that could be distribute to your guests by your shower hostess. If you don’t want to send out any cards, you could always rely on word-of-mouth. Your closest relatives and friends will gladly transmit this vital piece of information. Also, you should know that most stores ensure guest access, making it easier for your loves ones to find your registry and discover your wishes.

23 October 2013

Yes, you can buy cabinetry online

Say you’re working with a design-only designer on a kitchen renovation. Say that said designer puts together a plan to end all plans. A plan that takes efficiency and good taste to levels previously unimagined. Then what?


Since the lion’s share of kitchen design involves cabinetry, what do you do with a set of completed plans? How do you get from paper to a room you can cook in?

Well, one really simple way is by taking the plans you have and generating a list of components if your designer hasn't done that already. With that list you can go to a website like Cliq Studios, and place an order. There are a number of websites out there that’ll allow you to fulfill a cabinet order. A few more such sites are The Cabinet Factory, Kitchen Resource Direct and Kitchen Cabinet Depot. If you’re a homeowner buying cabinetry for the first time, each of those sites have staffed, toll-free numbers to hold your hand through the process.

These sites are set up to allow just about anyone to order semi-custom cabinetry. You choose the components you need in the dimensions you need them from an interactive catalog, just about the same way any industry professional does.

Ordering cabinetry is complicated but it needn't be overwhelming. There are a lot of parts to consider and to take into account but if your needs aren't too complex and you’re diligent in your approach, ordering cabinetry online may be the answer you’re looking for.

Explore the sites before you make a final decision though. Look for testimonials and look for details and descriptions about how the cabinetry’s constructed. Check to see where the cabinetry’s manufactured and for how long it’s warranted. Buying online is like buying anywhere. Ask a lot of questions and kick the tires as best you can before you take a leap.

Many online suppliers sell what are called RTA cabinets. RTA means flat-packed and ready to assemble. Be sure you’re up to the added labor if you buy RTAs and if the site doesn't define that term clearly, don’t buy from there. Similarly, look for details about the types of hardware used for hinges and drawer guides. If that information’s not listed on the site, call the 800 number. Good value kitchen cabinetry isn't just in the finish. It’s the hardware used that makes them last.

See too if they have a sample ordering program and what if any the charge is to get samples. Seeing color accurately on the internet is impossible, absolutely impossible and you have to see the actual product if you’re going to get an accurate preview of how things will look in your home. Again, if the site you’re on doesn’t have samples available or if they charge you for them, leave that site.

As you navigate the sites, look for endorsement logos from other entities. Such entities as HGTV and DIY Network don’t let fly by night organizations use their logos and only legitimate suppliers can be members of the NKBA.

Some sites have budgeting tools that will help you in your planning too. This tool from Cliq Studios is particularly helpful. Use budgeting tools as you plan and to help you keep a handle on costs as you move ahead on your project.

If you’re a design-only designer have you ever recommended an online resource to your clients? And if you’re a homeowner, have you ever used one of these suppliers? In either case, how was your experience? What advice do you have for someone who’s considering an online cabinetry purchase? Leave a comment, I’d love to hear some stories.


01 October 2013

The Affordable Care Act and you


It's here at long last. Though the Patient Protection and Affordable Care Act has been the law of the land since March 23, 2010 today marks the day when most people will notice the sea change it ushered in. Despite the fact that one of our political parties has been having a tantrum about it since the presidential election of 2008, despite that same party's willingness to shut down the Federal Government and sabotage the economy rather acknowledge the fact that Barack Obama is the President and despite the fact that same party's been hijacked by it's own lunatic fringe, the health insurance marketplaces are open for business.

So what does that mean precisely? Well with the help of Fran Berkman at Mashable and the Kaiser Family Foundation, here's a breakdown.

Whether or not you agree with the country's new health care policy, you should understand how it works. Here are a few things you need to know to get started.

The law is scheduled to take effect fully on Jan. 1, 2014. You can begin shopping and signing up for plans through the online marketplace starting today but the earliest a plan will take effect is Jan. 1. The enrollment period for 2014 lasts until March 31.

For subsequent years, the enrollment period will be open from Oct. 15 until Dec. 7. With few exceptions, these are the only time periods during which you can register for plans through the online marketplace.

Technically, using the health insurance marketplaces is available to everyone lawfully living in the U.S. The online marketplace is targeted at those who do not get insurance through their employers, but earn too much to qualify for Medicaid. The new law actually expands eligibility for Medicaid, and Medicaid rules vary by state. Your state's health insurance marketplace website will help you figure out whether you qualify. Alternatively, even if you do receive insurance through your employer, you can still use your state's online marketplace — though you're unlikely to find a better deal.

The "personal mandate" to have insurance means you will be charged a fee if you're uninsured for more than three months in a calendar year. The penalty, which increases each year, starts at $95 in 2014 or 1% of your yearly income — whichever is higher. If you choose to pay the fee, you do so when filing your tax returns. You may be exempt from paying this fee if you meet one of several conditions (listed here).

Residents of most states can find their online marketplace at HealthCare.gov. For residents of 16 states and the District of Columbia, however, there are state-specific websites. A "Get State Information" drop-down menu sits toward the bottom of this page and will instruct you where to find information based on where you live. Again, the main HealthCare.gov website will direct you via links to anywhere you need to go to research and buy a health insurance plan.

Prepare most of your personal documents for reference, specifically financial records. Since the law varies depending on your income, you will most likely need your recent tax returns and pay stubs.

The plans are divided into four tiers based on cost and level of coverage: bronze, silver, gold and platinum. The government will subsidize your health care with a tax credit if your yearly income is less than four times the poverty level.

The health care-focused Kaiser Family Foundation created the calculator below to help you figure out whether you are eligible for subsidies.


Remember that everyone is protected equally under the new law, meaning you can't be charged more due to gender or medical history. Additionally, you cannot be denied coverage due to any pre-existing conditions and your insurer cannot drop your policy after you file a claim. Although plans vary in level of coverage, all plans must cover 10 "essential health benefits" — including ambulatory services, emergency services, hospitalization, maternity and newborn care, mental health and substance use disorder services and more. While this part of the law took effect in 2010, remember that young people can stay on their parents' insurance plans until age 26.

For more information, the Kaiser Family Foundation has a number of resources on its website, or go straight to the source by visiting HealthCare.gov.

30 September 2013

My life on Instagram

In the last year and a half I've posted 642 photographs on Instagram and in the process, learned that I'm not a bad photographer. I've learned plenty more than that of course, but that's been my big takeaway.

When I started Instagramming I was a real stickler about only using my telephone's camera and only using the editor that's built into the app. I'm not not so picky anymore. I still use my phone's camera from time to time but there are two other cameras I've been using too. I never identify my equipment just to keep people guessing.

I used to look to this blog as a way to document my life but more and more, it's what I'm starting to depend on Instagram to do.

If you're not an Instagrammer, give it a shot. maybe it'll speak to you the way it has to me.

Here are ten photos from the last couple of months that have made it onto my personal favorites list. If you click on my name, the link will jump you to my Instagram profile page. Follow me and I'll follow you back.

All of the photos in my stream are available for purchase as either a hi-res file or as a 6"x6" or a 12"x12" print. Shoot me an e-mail if you're interested.

27 September 2013

Use Thermador appliances, win valuable prizes


Hey designers, The Thermador Kitchen Design Challenge is back and it's better than ever. Oh and when I say "hey designers" I mean to include all  professional designers, architects, builders, remodelers and kitchen dealers in that blanket term.

The contest this year has been expanded pretty significantly; the cash prizes on the line this year amount to $100,000 and the way to enter is as straightforward as it's ever been. There's no fee to enter and if you've been specifying Thermador you have no excuse not to enter.

Sixteen regional winners will receive a $2,500 cash prize and an expense-paid trip for two to a magnificent gala celebration in the fall of 2014 to compete for national prizes. How it works is this:

Regional Winners

  • 12 regional winners competing within six defined sales territories will receive $2,500 cash for the best overall use of Thermador appliances in any style kitchen design and will compete for national prizes.
  • 4 regional winners will receive $2,500 cash for the best use of Thermador built-in refrigeration in any style kitchen and will compete for a national prize.
  • All regional winners will also receive a trip for two to a magnificent celebration weekend in the fall of 2014.

National Winners: Traditional/Transitional

  • The regional winner with the best use of Thermador in a traditional/transitional kitchen design will receive a grand prize of $15,000 cash. One second place winner will receive $10,000 cash.

National Winners: Contemporary/Modern

  • The regional winner with the best use of Thermador in a contemporary/modern kitchen design will receive a grand prize of $15,000 cash. One second place winner will receive $10,000 cash.

National Winners: Best Use of Built-in Refrigeration

  • The regional winner with the best use of Thermador built-in refrigeration will receive a grand prize of $10,000 cash.

All you have to do is set up a profile, complete the online entry form, write a narrative of no more than 300 words, and upload your photos. March 14, 2014 is the deadline to enter.

The expanded version of the requirements and the general rules are:

Eligibility:

  • The 2012-2013 Thermador Kitchen Design Challenge is open to professional designers, architects, builders, remodelers and kitchen dealers.
  • Individual, team and company entries will be accepted.
  • There is no limit to the number of entries that can be submitted by an eligible Entrant as long as each Entry features a unique Kitchen Design. However, each entrant is only eligible for one regional prize and one national prize.

The Kitchen Design:

  • The kitchen design must include at least three Thermador appliances.
  • Kitchen designs may include non-Thermador appliances only if Thermador does not offer a similar product in our lineup. Non-Thermador ventilation will be allowed depending on the application.
  • All design and construction must be fully completed within the contest period of December 1, 2011 to December 31, 2013.

Entries must include all of the following:

  • A headshot of the entrant.
  • A minimum of two high-resolution photographs of the completed kitchen design in .jpg format. Additional photos are welcomed to show various perspectives, details and "before" shots. Blueprints, floor plans, elevations and perspective drawings may be included but will not be accepted as the only means of entry. Files should be no larger than 20 mb.
  • A written narrative of no more than 300 words describing your kitchen design.

You can find Thermador's complete rules by following this link.

In an industry heavy with design competitions and prizes, this one's the most straightforward. If you worked on a Thermador project or two recently, go ahead and enter. If you haven't then start specifying Thermador!

25 September 2013

Want to win a Discovery WineStation® from Dacor and the Decor Girl?

This is a Discovery WineStation® from Dacor.


This is Lisa Smith, the Decor Girl.


Isn't that a great shot? Kudos to my good friend Courtney for that one.

Together, Dacor and my friend Lisa are teaming up to give away one of Dacor's new Discovery WineStations.

What is a Discovery WineStation®? It's a combination wine chiller, wine preserver and wine dispenser --an at-home version of the chiller/ dispensers you see in wine and tasting bars.

Here's a description in Lisa's own words:
Introducing the first four bottle, automated, temperature controlled, wine preservation and dispensing system designed for the home. Small enough to sit on a countertop, this would look smashing on the home bar! There is also a trim kit for those super chic wine collectors wanting a flush built-in look. Enjoy the right wine on your time schedule. Imagine being able to maintain the quality of an opened bottle of wine for up to 60 days. Share a taste, a half glass or a indulge in a full glass of wine – you choose. Perfect for entertaining! Speaking of entertaining, this is going to completely wow your techno gadget friends. Individually program the display for each bottle to show wine type, wine year and varietal. With the dual zone temperature accessory, you can even split the temperature by 10 degrees.
It sounds pretty slick and it's certainly the first one of these to show up in the consumer market. These wine appliances retail for around $5000 and that's where Lisa comes in.

Decor Girl and Dacor have teamed up and are hosting a contest to give away one of these units. The contest is pretty simple and straightforward.

Take a picture of your favorite bottle of wine, maybe where you would put the wine station, a glass of wine, people enjoying wine – anything which would fit into the wine theme and email it to me.  Have fun.  The contest runs September 25 through October 4, 2013 and you’ll need to click here for the contest rules. Creativity will be rewarded and PhotoShop's fine. remember, e-mail your photo to Lisa (not me) by 4 October to be considered.

Once all of the photos are submitted, they'll then go to a panel of some of the smartest people on the planet. I'm on the panel so I can say things like that. Once we come to a consensus, Lisa will announce a winner and somebody gets to be the envy of their in-laws this Thanksgiving.

Give it a shot and while you're at it, follow Lisa on Twitter and Instagram and then like her on Facebook. It can only help.

24 September 2013

Wow Brizo, now that's a shower!

This is my brand new Hydrati™ 2|1 shower from Brizo. It arrived yesterday and I installed it in about five minutes last night.


I tested it after I installed it to make sure I had no leaks and waited to take a full shower with until this morning. Holy cow. Now that's a shower.

As a matter of disclosure, Brizo gave me this shower head. With that out of the way, let me describe some of the Hydrati™ 2|1 shower's features and benefits.

The new Hydrati comes in four primary styles and what I'm showing above, the "Euro Round," is the one I have. The head's certainly large enough and through a combination of button pushing and lever selecting, the Hydrati™ allows a user to select from four settings. They are: full H2Okinetic spray, massage, H2Okinetic spray with massage and pause. I'll explain what H2Okinetic in a bit but in the meantime I have to say that the pause built into this shower system is something my father would approve of.

When I was a kid he maintained that proper showering consisted of getting wet, turning off the shower, soaping up with the shower off and then turning it back on only to rinse off. We thought his suggestion was ridiculous of course but he did have a point. Brizo's pause function allows anybody to follow my father's suggested showering method without having to readjust the water temperature.

The Hydrati™ 2|1 shower gets the two in one portion of its name from the fact that it's a convertible --it's a wall-mount and a hand-held shower and the spray patterns are adjustable on each component.

Here's an example of a Hydrati™ 2|1 Euro Square in the middle of uncoupling.


The independent function of the hand-held and wall-mount components allow a user to turn off the main head and use the hand shower, use the main head only or to use them both. When the hand-held shower's not being held in someone's hand, it locks into the main head with Brizo's MagneDock® magnetic docking system There's no eyes closed fumbling involved. All someone has to do is hold the handheld up to the main shower head and the magnets take care of the rest. Pretty slick.

Now back to H2Okinetic Technology for a second. H2Okinetic Technology is something that Brizo (and its parent company Delta Faucet) developed with the Bowles Fluidics Corporation and what it does is harness the kinetic energy in moving water to alter and enhance the way water droplets are delivered. Each spray outlet on a H2Okinetic fixture uses the pressure of the water passing through it to take on a very specific pattern of movement. This pattern makes a shower feel like it's using more water than it is and the effect is amazing. This video from Delta Faucet describes and illustrates what this means particularly well:


You can read more about it on Brizo's website too. While you're on their site, look over the rest of their offerings too --they make beautiful and highly functional fixtures.

As always Brizo, thanks!


23 September 2013

Lights! Camera! Blanco!

Recently, I had the good fortune to visit my friends and colleagues at Blanco on the set of a photo and video shoot. The folks from Blanco's marketing department is working on the catalog shots and video footage they'll use when they roll out a new campaign in a couple of months.


While I was on set I saw some old favorites and a lot of new stuff I can't talk about. But brace yourselves.

Listen, I get it that many people's eyes glaze over when I start gushing about innovations in sink design. But think about it. What component do you use more than any other in your kitchen? The smart money's on you answering "the sink." So why not spend some time considering this heavily utilized and underappreciated feature in every kitchen?

Blanco does that and more. Every aspect of how people use their products is thought through and and analyzed. Their research informs their finished designs to an alarming, though understated way.

For example, on most flat bottomed stainless sinks the sink walls and the sink floor meet each other at a sharp, 45-degree angle. You know what you can't do with a sharp 45-degree angle at the bottom of a sink? That's right, you can't clean it very easily. On a Blanco flat bottom sink, the joints between the sinks walls, sides and floor meet at a gentle, 10mm radius. You know what the average radius of a human being's index finger is? That's right, 10mm.

Flat bottomed steel sinks such as Blanco Precision™ Sinks are engineered around the dimensions of the human body to make them easier to clean.


Another great example is from my favorite sink in the universe, the Blanco Modex™. The drainboard built into this sink is pitched in two directions (backward and toward the sink) so water can't get anywhere but down the drain. That's more solid thought expended on a sink that makes it easier to use and live with.

While I'm gushing over the Modex, here's a video that 'splains it all:


As cool as the Modex is, just wait'll you see the new stuff Blanco has coming.

My on set visit with Blanco took place at the Shadowlight Group and I was absolutely blown away by their skills and their facility. Have a product you want to have photographed or filmed? Give them a call.

As always, it was great to see my friends from Blanco. I'm fortunate to know first hand that with a company like Blanco, I know that the great products they produce are backed by some of my favorite people in the industry.